vendredi 27 novembre 2009

Natalya aime /Natalya loves /Что мне нравится

Message uniquement pour les francophones
Message for French speaking only
Сообщение для французо-говоряших


Idées Cadeaux Noel :

Si vous n'avez pas une idée de cadeau précise, je vous conseille de visiter le site qui vend des produits du monde. Les produits viennent du monde entier : du Japon, des Etats Unis, de l’Italie, de Thaïlande…
J’aime bien leur choix de confitures : confiture de figues vertes, confiture de pastèque, confiture de citrons verts, confiture de lait, confiture de noisette…
Des confitures bio sont proposées également.
Ils ont un grand choix de café et de thé.
Café et thé de marque "Taylors of Harrogate » est également disponible sur leur site.
Si vous aimez la cuisine asiatique, pensez à acheter une bonne sauce curry : curry vert, curry rouge, curry Tandoori (de 1.49 à 5.75 euros par pot)
J’ai été contente d’y trouver la citronnelle Thai émincée à 1.49 euros pour 115 gr.

Je vous laisse découvrir ce site par vous-même :

http://www.lesbonsproduitsdumonde.com/

Idées Desserts au chocolat:

Je vous propose de découvrir plein de délicieuses recettes de desserts au chocolat sur le site du chocolat Nestlé Dessert.

http://www.latableadessert.fr/

Si vous comptez réaliser une buche de Noel en dessert pour le repas de Noël et vous n’avez pas d’idée, il y a une autre bonne raison pour visiter ce site.
Voici une petite liste des recettes de buches que le site propose : Bûche de Noël au pain d'épices, Bûche chocolat marron, Bûche aux marrons, Bûche à la banane, Bûche fondante au nougat tendre et pâte d'amande.

Leur recette de muffins au chocolat est terriblement facile et bonne. Vous avez besoin de : 3 œufs, 100 g de NESTLE DESSERT, 150 g de beurre + pour les moules , 200 g de farine , 150 g de sucre en poudre. Mélangez tous les ingrédients et faites cuire les muffins au four préchauffé à 200 C pendant 20 minutes.


Voici le lien :
http://www.latableadessert.fr/Recettes/Muffins+au+chocolat-RecipeId=6947.aspx

J’espère que vous apprécierez ces sites comme moi !!

mercredi 25 novembre 2009

Spinach and goat’s cheese lasagna / Lasagne au chèvre et aux épinards / Лазанья со шпинатом и козьим сыром


English Version

Spinach and goat’s cheese lasagna

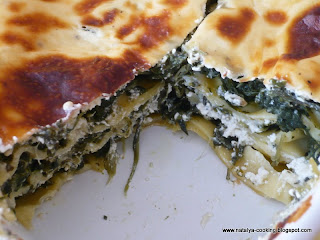
There are many versions of lasagna. The recipe I propose today is a vegetarian one. It contains spinach, cheese and nutmeg flavored béchamel sauce. To make this recipe I decided to choose goat’s cheese which perfectly goes with spinach. But in the south of Italy lasagna is more frequently made with ricotta and mozzarella. As a rule lasagna is topped with grated Parmigiano-Reggiano cheese.
This dish is rich and creamy in taste. The layers of spinach, cheese and béchamel sauce are tasty.

Give a try to this delicious recipe as nothing is better than homemade lasagna.

Serves 4:

300 gr of goat’s cheese
8-10 pre-cooked lasagna sheets (depends on the size of your baking tin)
500 gr of frozen spinach
2 cups of béchamel sauce(70 gr of butter +70 gr of flour + 500 ml of milk, salt, pepper and 1 teaspoon of nutmeg)
1 teaspoon of origan
1 teaspoon of basil
4-5 tablespoons of milk

How to make it:
Defreeze the spinach as indicated on the package.
Meanwhile, make béchamel sauce. In a medium heavy saucepan, melt butter over low heat. When butter starts to foam, add the flour all at once, mixing well with a wooden spoon. Cook over low heat 3 to 4 minutes, stirring constantly to incorporate and cook flour. Remove pan from heat. Add milk at once (to avoid the formation of lumps) and let simmer, stirring gently with a wire whisk or wooden spoon over medium-low heat. Cook until smooth and thickened. Add salt, pepper and nutmeg to taste.
In a bowl combine goat’s cheese and 4-5 tablespoons of milk. Salt, pepper to your taste. Add origan and basil.

To assemble the lasagne, add about 1/2 cup of béchamel sauce on the bottom of greased dish.
Make a layer of lasagna sheets.
Take about a quarter of the spinach and layer on top of the lasagna sheets.
Make a layer of goat’s cheese mixture.
Add the next layer of béchamel sauce, then lasagna sheets, spinach and goat’s cheese mixture.
Continue layering in this order : finish with béchamel sauce on top.
Preheat oven to 200 C.
Bake in a pre-heated oven for 30-40 minutes until the top is lightly browned.
Let rest 15 minutes before cutting.

French Version

Lasagne au chèvre et aux épinards

Il y a plusieurs variétés de lasagnes. La recette que je vous propose aujourd’hui est celle au chèvre et aux épinards. C’est bon les lasagnes faites maison. Sa texture est douce, onctueuse et fondante à la fois, nappée d’une sauce béchamel parfumée à la noix de muscade. Vous pouvez remplacer le fromage de chèvre par la ricotta ou la mozzarella. Avant d’enfourner, parsemez de parmesan râpé.

Pour 4 personnes :

Ingrédients :
500 gr d'épinards surgelés300 g de fromage de chèvre frais
1/2 paquet de feuilles de lasagne = 8-10 feuilles
500 ml de sauce béchamel (70 gr de beurre +70 gr de farine + 500 ml de lait+ sel, + poivre + noix de muscade)
sel et poivre1 c à café d’origan
1 c à café de basilic
4-5 c à soupe de lait

Préparation:
Préchauffez le four à 200°C (Th 6-7).Décongelez les épinards, à feu doux, dans une casserole ou dans une micro-onde.
Mélanger le fromage de chèvre et 4-5 c à soupe de lait. Saler, poivrer. Ajouter l’origan et le basilic.
Préparer une sauce béchamel pour obtenir 250 ml =2 tasses.
Dans un grand plat à four beurré, mettre une couche de béchamel, poser une couche de lasagnes, puis une couche d'épinards, puis une couche de fromage de chèvre, puis un peu de béchamel, puis à nouveau une couche de pâtes... Faire 3 couches en terminant par la béchamel.
Laisser cuire environ 30 -40 minutes au four préchauffé à 200 C.
Laisser reposer pour 15 minutes avant de couper les lasagnes.

Russian Version

Лазанья со шпинатом и козьим сыром

Лазанья – итальянское блюдо, состоящее из нескольких слоев мяса, листьев или пластов лазаньи, белого соуса бешамель и сыра. Вариантов на тему лазаньи много, так как можно варьировать начинки. Я же предлагаю вам рецепт вегетарианской или овощной лазаньи, которая готовится с использованием шпината и козьего сыра. Козий сыр можно заменить на греческий сыр фету, брынзу, рикотту или мозареллу. Перед тем как отправить блюдо в духовку, вы можите посыпать сверху тертым сыром пармезаном (по итальянски - пармезан звучит как «Пармиджано Реджано»). Но а если у вас не оказалось пармезана, то замените его на любой сыр твредого сорта.
Это блюдо получается ароматным и нежным, и тает во рту благодаря соусу бешамель.
Попробуйте и вы !

На 4 порции:

500 гр замороженного или свежего шпината
300 гр мягкого козьего сыра
8-10 листов лазаньи
500 мл соуса бешамель (на его приготовление вам понадобится 70 гр сливочного масла + 70 гр муки+ 500 мл молока +соль, перец+1 ч ложка мускатного ореха)
1 ч ложка сушеного оригано
1 ч ложка базилика
4-5 ст ложки молока

Разморозить шпинат в микроволновке, как указано на упаковке (приблизительно 7-9 минут).

Если вы используете свежий шпинат, то переберите его, тщательно промойте и бланшируйте 2 минуты в кипящей соленой воде, дать стечь.

В небольшой миске перемешайте козий сыр и молоко. Посолите, поперчите на ваш вкус. Добавьте оригано и базилик. Можно приправить другими травами, например, тимьяном.

Приготовьте соус « бешамель ». Это белый соус, который готовится на основе жидкой сметаны (сливок) или молока, масла, муки. Я всегда использую молоко в его приготовлении.

Итак, растапливаем в сотейнике масло, поджариваем на нем муку до золотистого цвета и тонкой струйкой вливаем молоко, не переставая помешивать. Варим до загустения. В конце солим, перчим. Добавляем мускатный орех, он придает ароматность соусу.Снимаем с огня.

Смазать форму для запекания сливочным маслом.
На дно выложить часть соуса бешамель, затем листья лазаньи, потом размороженный шпинат и закончить козьим сыром.
Повторить слои в той же последовательности, завершив блюдо соусом бешемель.
Запекайте в разогретой духовке при 200 С в течении 30-40 минут до образования светло-коричневой корочки.
Дать настояться в духовке 15 минут перед тем, как нарезать лазанью на порции.

mardi 24 novembre 2009

Pumpkin-carrot-potato purée /Purée de potimarron, carottes et pommes de terre / Картофельно- марковное тыквенное пюре


English Version

Pumpkin-carrot-potato purée

I know Halloween Celebration is behind. But I guess we don’t need any special occasion to make a delicious homemade pumpkin purée.
For me pumpkins are an icon of autumn, cold and wintery days. Pumpkin is nutritious, it is low in fat and contains Vitamin A that we desperately need on a cold autumn day.
Give a try to this delicious creamy purée.

Serves 4-6 :

1 small pumpkin
3 carrots, peeled and sliced
2 potatoes, peeled and sliced
50 gr of butter
Salt, pepper
1 teaspoon of nutmeg

Put pumpkin, carrots, potatoes in a large pot with water. Bring water to a boil. Cook for 25-30 minutes over a medium heat until all vegetables are cooked.
Drain carrots and potatoes. Save ½ cup of water.
Split the pumpkin in half and seed it. Remove the stringy fibers by scraping the insides with a metal spoon.
In a food processor or with a blender, add water and puree until almost smooth
Season with salt and pepper to taste.
Add butter and nutmeg.
Mix.
Serve hot.
I served purée with roasted chicken and it was yummy.

French Version

Purée de potimarron, carottes et pommes de terre

Le temps de la récolte des courges est arrivé et voici une des recettes à base de potimarron. Cette purée est, à mon goût, un vrai régal, elle est douce et onctueuse.
Vous pouvez servir le poulet avec cette purée.

Pour 4-6 personnes :

1 potimarron petit
3 carottes, pelées, coupées en cubes
2 pommes de terre, pelées, coupées en cubes
50 gr de beurre
Sel, poivre
1 c à café de noix de muscade

Mettre les légumes dans une grande casserole. Couvrir d’eau et porter à ébullition.
Baisser le feu et faire cuire pendant 25-30 minutes jusqu’à ce que les légumes soit bien fondants.
Retirer la casserole du feu.
Egoutter les carottes et les pommes de terre à l’aide d’une passoire, les mettre dans un grand saladier.
Sortir le potimarron. Couper le en deux et enlever les graines et fibres qui se trouvent à l’intérieur. Couper la chaire en cubes avec un couteau ou une fourchette.
Placer les cubes de potimarron dans un saladier avec les carottes et les pommes de terre.
Réduire-les en purée à l’aide d’un mixeur ou d’un blender. Ou écraser à l’aide d’un presse-purée.
Mettre le beurre, le sel, le poivre et la noix de muscade.
Mélanger bien.
Déguster chaud !

Russian Version

Картофельно- марковное тыквенное пюре

Наступила осень и пора тыкв. Вот один из рецептов, который можно приготовить из тыквы.

На 4-6 порций:
1 тыква, маленькая
3 марковки, очистить, порезать на кубики
2 картошки, очистить, порезать на кубики
50 гр сливочного масла
соль, перец по вкусу
1 ч ложка мускатного ореха

Порезать мякоть тыквы на небольшие кусочки.
Взять большую кастрюлю, залить водой и довести до кипения. Положить в нее тыкву, марковь и картошку и варить на медленном огне в течении 25-30 минут до готовности овощей. Овощи должны быть мягкими, и свободно протыкатся вилкой.
Как овощи сварятся, убрать кастрюлю с огня.
Процедить овощи.
Выложить сваренные овощи в большую чашку или салатницу. Измельчить до однородной массы миксером, блендером или обычной толкушкой.
Добавить сливочное масло, мускатный орех, посолить и поперчить по вкусу. Все перемешать.
Пюре готово, подавать горячим !
К этому пюре я запекла курицу в духовке.
Курица и пюре отлично сочетаются вместе !

lundi 23 novembre 2009

Breakfast bars / Barres de céréales pour le petit-déjeuner / Мюсли-батончик на завтрак


English Version

Breakfast bars

The recipe I am posting today is a Cookalong November Challenge proposed by Markella, who was nominated to choose the recipe of the month.
I’d like to thank Markella for choosing this wonderful recipe as I really enjoyed cooking and eating them. Guess what? I am addicted to them now. They are so good: they are tasty and crunchy. They are very easy to make.
For me breakfast is important. I never skip it. These bars are perfect for breakfast or as a snack at any time. If you are in a rush in the morning, just grab them and eat them on the go. I think the best idea is make them on the weekend and enjoy eating them the whole week. They are nutritious. Believe me if you start your day on these delicious breakfast bars, you’ll feel better and you’ll easily handle problems and stressful situations of the day.

To find Nigella’s original recipe, click on the link:
http://www.nigella.com/recipe/recipe_detail.aspx?rid=126

I have slightly changed Nigella’s recipe. I didn’t find unsalted peanuts and I replaced them with a mix of dried cranberries, almonds and macadamia nuts. I also added some flaxseed and malted rye flakes. I guess any kind of nuts and seeds will be perfect for this recipe. If you don’t have dried cranberries, replace them with any dried fruits you like: currants, dates, figs, prunes, raisins, apricots.

Here is the list of ingredients I used to make 18-20 bars:

1 can of condensed milk =397 gr
250gr of rolled oats (not instant)
75 gr of shredded coconut
240 gr of a mix of dried cranberries, almonds and macadamia nuts
140 gr of mixed seeds: sesame seeds (60 gr), sunflower seeds, flaxseed, malted rye flakes

Preheat oven to 130 C.
Heat the condensed milk in a saucepan over low heat. Don’t let the milk boil.
In a large bowl combine rolled oats, shredded coconut, dried cranberries, almonds, macadamia nuts and seeds.
Pour milk over the nuts-seeds mixture. Stir well with a wooden spoon.
Pan the mixture evenly on a baking tin. Press firmly.
Place a baking tin into the oven for 1 hour.
Let cool for 15 minutes and cut into squares.

French Version

Barres de céréales pour le petit-déjeuner

La recette de ces barres de céréales vient du site de Nigella. C’est une Challenge du mois de Novembre : c’est une recette choisie par un des participants au forum de Nigella. Tout le monde peut la réaliser et ensuite partager ses opinions sur la recette.

Cette recette a été choisie par Markella et je la remercie de son choix car j’ai adoré ces barres de céréales.

Ces barres de céréales sont très faciles à faire : elles sont délicieuses et croquantes.
Elles sont parfaites pour le petit-déjeuner, en cas de petits faims ou pour le gouter de vos enfants.

Pour réaliser 18-20 barres, il vous faut :
1 boite de lait concentré sucré (397 gr)
250 gr de flocons d’avoine
75 gr de noix de coco râpé
240 gr de canneberges, amandes et noix de macadamia
140 gr de graines de sésame, graines de tournesol, graines de lin, flocons de seigle malté

Préparation :

Préchauffer le four à 130 C.
Dans une casserole, faire chauffer le lait concentré sucré à feux doux pendant 2-3 minutes.
Dans un saladier, mélanger les fruits secs, les noix et les graines.
Incorporer le lait dans le mélange fruits secs-noix-graines.
Mélanger le tout bien en remuant avec une cuillère en bois.
Verser la préparation dans un plat ou une moule carré beurrée. J’ai utilisé une moule en aluminium.
Tasser la préparation avec vos mains.
Faire cuire au four pre-chauffé à 130 C pendant 1 h.
Laisser refroidir pendant 15 minutes, couper des rectangles.

Russian Version

Мюсли-батончик на завтрак

Предлагаю вам рецепт мюсли-батончика, который отлично подойдет на завтрак с чашкой кофе или чая. Этот батончик не заменит вам полноценного завтрака, но он придаст вам сил, так как в него входят питательные и полезные злаки,орехи и сухофрукты.
Злаки и орехи богаты белками, углеводами и клетчаткой, полезны для пищеварения и хорошо борются с чувством голода.

Чтобы приготовить 18-20 батончиков, вам понадобится:

1 банка сгущенки
250 гр овсяных хлопьев
75 гр кокосовой стружки
240 гр клюквы, миндальных орехов и орехов Макадамия (орехи Макадамия можно заменить на грецкие или кедровые орехи)
140 гр кунжутных семечек, семечек подсолнечника, ржаных хлопьев, семена льна

Как приготовить:

Разогреть духовку до 130 градусов.
Подогреть сгущенку на слабом огне в течении 2-3 минут
В салатнице перемешать овсяные хлопья, кокосовую стружку, орехи и семечки.
Залить все теплой сгущенкой.
Все перемешать деревянной лапаточкой.
Выложить массу в блюдо. Выровнять лапаточкой или прижать руками.
Выпекать в разогретой духовке в течении часа.
Дать остыть 15 минут.
Порезать на квадратики.

vendredi 20 novembre 2009

« Pychki « ou des beignets russes parfumés à l’orange cuits au four / “Pishki “or oven baked Russian doughnuts with orange flavor / Апельсиновые пышки


French Version

« Pychki « ou des beignets russes parfumés à l’orange cuits au four

Voici une autre recette des beignets russes. Ces beignets ont la particularité d'être cuit au four et non dans la friture. Ils sont moelleux et pas trop gras. J’ai utilisé le jus d’orange pour leur donner un gout d’orange. Pour mesurer les ingrédients, prenez 1 verre ou une tasse de 250 ml.
Pour réaliser ces beignets, utilisez des moules à muffins ou des ramequins individuels.

Pour 12 beignets, il vous faut :

2 tasses de farine
1 tasse de sucre (j’ai mis que la moitié)
1 sachet de levure chimique
1 œuf
5 c à soupe d’huile végétale
Pincée de sel
125 ml de jus d’orange

Préparation :

Préchauffer le four à 200 C.
Dans un saladier battre l’œuf avec le sucre, l’huile végétale, le jus d’orange. Incorporer la farine, la levure chimique et le sel. Mélanger.
Beurrer vos moules à muffins ou utiliser des caissettes en papier.
Verse la pate dans les moules à muffins à l’aide d’une grosse cuillère.
Enfourner pendant 20-25 minutes
Servir avec du miel ou de la crème fraiche.

English Version

“Pishki “or oven baked Russian doughnuts with orange flavor

I have already posted a recipe of Russian doughnuts. Those doughnuts were fired in oil but these ones are baked in the oven. That makes a difference. Baked oven doughnuts are not high in fat. Moreover I reduced the required quantity of sugar: I used only ½ cup of sugar instead of 1 cup. They turned out fluffy and light.
These doughnuts are great for breakfast. You can also bake these doughnuts on weekends and enjoy the leftovers for grab-and-go weekday. They keep very well in the fridge for about a week.

Makes 12 doughnuts:
2 cups of all-purpose flour
1 cup of sugar
10 gr of baking powder
1 egg
5 tablespoons of vegetable olive
Pinch of salt
½ cup =125 ml of orange juice
How to make them:

Preheat oven to 200 C.
In a bowl beat egg with sugar, vegetable oil, orange juice. Stir in flour and baking powder. Add salt.
Fill greased muffin tins 1/2 full.
Bake at 200°C for 20-25 minutes slightly golden or until a toothpick inserted near the center comes out clean.
Serve with honey or heavy cream.
Russian Version

Апельсиновые пышки в духовке

Ну,вот скажите вы: Снова пышки ! Не знаю, но в последнее время меня так и тянет приготовить что-нибудь из русской кухни: борщ, плов, салат Оливье.... пышки.
Наверное потому, что я давно не готовила русских блюд, и соскучилось по вкусным домашним русским блюдам. А может быть потому, что за окном осень, серо и грустно, и так хочется порадовать себя чем-нибудь вкусненьким. Рецепт этих пышек отличается от традиционного тем, что эти пышки пекутся в духовке, а не обжариваются на растительном масле. Пышки получаются мягкими и ароматными со вкусом апельсина. Апельсиновый сок можно взять любой, что у вас оказался дома. Для измерения ингредиентов в качастве стакана возьмите обычный стакан для чая, который вмещает в себя не менее 250 мл.
Пышки подавайте горячими с медом или со сметаной !

Итак, чтобы приготовить 12 пышек, вам понадобится:
2 стакана муки
1 стакан сахара (я использовала только половину)
1 пакетик разрыхлителя или 1 ч л гашеной соды
1 яйцо
5 ст ложек растительного масла
Соль
½ стакана апельсинового сока (125 мл)

Разогрейте духовку до 200 С.
Всбить яйцо с сахаром, маслом и апельсиновым соком, добавить муку и разрыхлитель. Посолить. Замесить тесто, оно не должно быть густым. Если тесто получаентся густым, то добавьте 2-3 ст ложки молока.
Заполните тестом формочки для маффинов, и выпекайте пышки в разогретой духовке в течении 20-25 минут.

mercredi 18 novembre 2009

Almond and hazelnut cookies / Cookies aux amandes et aux noisettes / Орехово-миндальное печенье


English Version

Almond and hazelnut cookies

If you like almonds and hazelnuts, you’ll certainly love this recipe. The recipe of cookies I propose you today is a great treat which goes perfectly with coffee and can be made for coffee or tea gatherings. These cookies are such a great snack to carry around in your pocket if you're constantly on the go.

They are crispy on the outside but tender within with a nice almond and hazelnut flavor. As for me I like them for breakfast with a cup of tea.

As for the origin of the recipe, I found it on one of Russian cooking sites. Her owner, Nastya, a young lady living in Novosibirsk, proposed the recipe of almond cookies without flour. Her cookies were made only with blanched almonds (300 gr), 1 egg, 150gr of white sugar and some vanilla sugar. Her cookies looked so yummy that I immediately decided to try the recipe. I guess I was attracted by the simplicity of the recipe and its ingredients. It is made in no time. Moreover I am very fond of almonds. I love to put them in my yoghurt with some dried fruits. I looked into my pantry and found some almonds and hazelnuts. That’s how the idea of adding some chopped hazelnuts in the cookies came to me. I reduced the quantity of sugar as I find almonds and hazelnut sweet enough. But if you prefer, add some more sugar for more sweetness. For me 5 tablespoons of sugar was fairly enough.

If you want to make these delicious cookies, here is the ingredient list of what you’ll need to make 20 cookies:

200 gr of chopped almonds
125 gr of chopped hazelnuts
5 tablespoons of white sugar
Vanilla sugar
2 eggs
3-4 tablespoons of milk
Some almonds for decoration
How to make them:

Preheat oven to 180 degrees C.
In a large bowl beat sugar and eggs.
Stir in chopped almonds and chopped hazelnuts.
Use a wooden spoon to mix all ingredients. Add milk.
Form small balls with hands.
Put cookies on a baking sheet.
Place an almond on each cookie.
Bake in a pre-heated oven at 180 C for 25 minutes.

French Version

Cookies aux amandes et aux noisettes

Si vous aimez les amandes et les noisettes, cette recette gourmande devrait vous plaire. Ces cookies sont parfaits pour le petit-déjeuner ou un gouter. Ils sont faciles et rapides à faire. Quand j’ai vu cette recette, j’ai été séduit par sa simplicité. La liste des ingrédients est simple : la poudre d’amande et la poudre de noisettes se trouvent facilement dans les supermarchés.

Cette recette à l’origine n’était faite qu’avec des amandes. Son auteur, Nastya, une jeune fille russe qui habite à Novossibirsk, utilise 300 gr de poudres d’amandes, 1 œuf, 150 gr de sucre et 1 sachet de sucre vanille.

Quant à moi, j’ai légèrement changé sa recette en ajoutant la poudre de noisettes dans la préparation et en réduisant la quantité de sucre à 5 cuillères à soupe. Si vous préférez un gout plus sucré, mettez plus de sucre.

Si vous êtes curieux, voici la liste des ingrédients pour réaliser 20 cookies :

200 gr de poudre d’amandes
125 gr de poudre de noisettes
5 c à soupe de sucre
1 sachet de sucre vanillé
2 œufs
3—4 c à soupe de lait
Des amandes entières pour décoration

Comment faire :

Préchauffer el four à 180 C
Dans un bol mélanger le sucre et les œufs. Y incorporer la poudre d’amandes et de noisettes. Ajouter y le lait. Mélanger.
Façonner des cookies avec les mains.
Disposer-les sur la plaque du four recouverte de papier sulfurisé.
Décorer avec des amandes entières.
Enfourner les cookies et laisser-les cuire environ 20-25 minutes.
Laisser-les refroidir un peu avant de les décoller et disposez-les sur une grille.

Russian Version

Орехово-миндальное печенье

Если вы любители орехов и миндаля, то этот рецептдолжен вам прийтись по вкусу.
Это печенье выдалось ароматным, оно хрустящее снаружи и мягкое внутри. Он отлично подходит на завтрак с чашечкой кофе или чая. Несмотря на то,что это печенье не содержит муки и масла, оно получается сытным, поэтому его много не съешь за раз, так как в самом миндале содержится большое количество жирного масла, белков и сахаров.
Вы можите его полажить в банку с герметической крышкой и хранить в холодильнике до 5-7 дней. А если вы ждете гостей, то приготовьте его заранее, оно совсем не испортится. Когда оно пекется в духовке, квартира так и заполняется душистым запахом миндаля и орехов.

На изготовление этого рецепта меня вдохновила Настя, у которой есть свой кулинарный сайт, о нем я вам уже говорила ранее. Так вот она, приготовила печенье из миндаля. Увидив фотографию с печеньем, мне сразу же захотелось приготвоить этот рецепт. У меня дома также имелся молотый лесной орех, и идея о том, чтобы добавить его в печнье сразу же пришла мне в голову. И по-моему, получилось совсем даже неплохо.
Если вы же вам интересен рецепт миндального печенья Насти, вот ссылка на ее сайт.
Так как во Франции продаются пакетики готового очищенного молотого и дробленного миндаля и лесного ореха, то мне не составило никакого труда приготовить это печенье. Если же у вас оказался неочищенный и немолотый миндаль, и вы не знаете, как его очистить и измельчить, то в своем рецепте Настя подробно объясняет, как это сделать.

http://www.say7.info/cook/recipe/714-Mindalnoe-pechene.html

Еще отмечу один момент: Настя в своем рецепте использует 100 гр сахара, я же использовала всего 5 столовых ложек, и посчитала это количество достататочным, так как сам миндаль и орехи имеют сладкий привкус. Но если вы предпочитаете более сладкое печенье, то добавьте побольше сахара.
Отдельное спасибо Насти за этот рецепт !

Если же вам любопытен мой рецепт, то вот список ингредиентов, которые вам понадобятся, чтобы приготовить 20 штук печенья:

200 гр очищенного и измельченного миндаля
125 гр очищенного и измельченного лесного ореха
5 ст ложек сахара
1 пакетик ванильного сахара
2 яйца
3-4 ст ложки молока
Несколько цельных миндалин для укрешения

Как приготовить:

В большой салатнице или чашке всбейте сахар с яйцами. Затем добавьте туда миндаль и орехи. Потом молоко. Хорошо перемешайте.
Из полученной массы сформируйте средней величины шарики, придавив их немного между ладонями, чтобы шарик ваш не рассыпался.
Выложите печенье на противень. Украсьте каждое печенье цельным миндалем.
Выпекайте в разогретой духовке при 180 градусах в течении 20-25 минут.

Banana muffins / Muffins aux bananes / Банановые маффины


English version

Banana muffins

You’ll probably be surprised by seeing another recipe of muffins on my blog. What can I say more ? It’s true I have already posted more than 10 muffin recipes and I am still passionate about cooking and eating them. Every time when I come across a new muffin recipe, I try to imagine how it’ll turn out. The recipe I am proposing you today is really a delicious one. I even didn’t have to imagine how it would turn out as I knew these muffins would be yummy. Why will you ask me? The answer is simple: it’s Nigella’s recipe. For me Nigella is a queen of chocolate dessert and muffins recipes. All Nigellas’ chocolate dessert and muffins recipes I tried turned out wonderfully delicious. And moreover, they are so easy and quick to make.

In her recipe Nigella makes these muffins with butterscotch morsels. I didn’t have them at home and I didn’t want to go into a grocery to buy them as I was so impatient to try this recipe. And besides, my hubby isn’t a big fan of caramel. So, I had some bananas in my fruit bowl. Nigella suggests using ripe bananas but my bananas were fresh ones and I didn’t see any problem in trying this recipe with fresh bananas. Believe me, the result was really good. What I love about this recipe is that you don’t need to buy any extra ingredients. All ingredients can be easily found in your cupboard and fridge: flour, baking powder, sugar, vegetable oil, eggs. This recipe requires minimum of efforts and is made in no time.

Give a recipe a try and you won’t be disappointed with the result! You’ll be pleasantly surprised how these banana muffins turn out so tasty, flavor and extra moist.

If you want to see Nigella’s recipe, clink on the link:

http://www.nigella.com/recipe/recipe_detail.aspx?rid=155

Here is my version of the recipe:

You’ll see that Nigella doesn’t put a yogurt in the batter. As for me, I am convinced that some muffins or cake recipes are perfect if we add some yogurt in them. That’s what I did. I put 1 Greek yogurt and 2 tablespoons of milk. This combination yogurt/milk helps to give the muffins such a soft texture.

Makes 14:

3 ripe bananas (ripe or fresh)
125ml vegetable oil
2 eggs
250g flour
100g caster sugar
1/2 teaspoon bicarbonate of soda
1 teaspoon baking powder
1 cup of Greek yogurt = 150 gr
3 tablespoons of milk

How to make them :

In large mixing bowl stir together the flour, sugar, baking powder.

Make a well in the center .

Combine eggs, milk, oil. Add egg mixture all at once to flour mixture. Then add grated bananas.

Stir just till moistened: batter should be lumpy.

Spoon into greased or paper-bake-cup-lined muffin cups, filling each about 2/3 full.

Bake in a pre-heated 200 C oven for 25 or till golden. Remove from pans: serve warm.

Advice: As Nigella suggests, you can add 150 gr of butterscotch morsels or chocolate chips.

French version

Muffins aux bananes

Vous allez être surpris de voir une autre recette de muffins sur mon blog. Il est vrai que j’ai déjà posté plus de 10 recettes de muffins et cela continue. J’aime des muffins et la simplicité de les faire. Cette recette de Nigella est particulièrement bonne. Les muffins sont extra moelleux et parfumés avec un gout prononcé des bananes.

Nigella incorpore les morceaux de caramel à la préparation. Moi, je n’avais pas de caramel à la maison. Cela ne m'empêchait pas de réaliser cette délicieuse recette uniquement avec des bananes.

Cette recette est d'une simplicité désarmante et ne nécessite que de très peu d'ingrédients que vous devez avoir dans vos placards et frigo : la farine, le sucre, la levure chimique, l’huile végétale.

J’ai légèrement modifié sa recette en y mettant 150 gr d’yaourt grec et 3 c à soupe de lait. J’ai obtenu des muffins très moelleux.

Testez cette recette et je vous assure que vous ne serez pas déçus !

Avec cette pate, vous aller obtenir entre 12 et 16 muffins, tout dépend de la taille de vos bananes.

Il vous faut :
3 bananes écrasées
125 ml d’huile végétale
2 œufs
250 gr de farine
1 sachet de levure chimique
1 pot d yaourt grec (=150 gr)
3 c à soupe de lait

Mélanger les ingrédients secs. Y ajouter les ingrédients liquides. Mélanger.Verser la préparation dans des moules à muffins en silicone.Disposer des pépites de chocolat sur le dessus.Cuire au four préchauffé à 200°C pendant 25 minutes environ.

Russian version

Банановые маффины

Вы, наверное, удивитесь, увидев еще одни рецепт маффинов. Я опубликовала уже более 10 рецептов маффинов, и не собираюсь на этом останавливаться, так как я считаю маффины одной из самых простых, вкусных и доспупных выпечек, которая нравится как детям, так и взрослым.

Обычно, когда я вижу тот или иной рецепт маффинов, я мысленно стараюсь представить, какими он получятся по вкусу. Рецепт, который я вам предлагаю, я увидела на сайте британского повара Найджилы Лоусон, и я ни на секунду не сомневалась, что он получится вкусным. Так и оказалось. Эти банановые маффины получились мягкими, воздушными и ароматными. Они словно таяли во рту.

Что мне больше всего нравится в этом рецепте, так это его простота приготовления и обычные ингредиенты, которые найдутся у каждой хозяйки дома. Все,что вам нужно - это мука, яйца, сахар, растительное или оливковое масло, пакетик разрыхлителя, йогурт, молоко.

Отмечу, что Найджила Лоусон не использует йогурт и молоко. Я же считаю, что именно йогурт и молоко придают маффинам нежность и мягость, а бананы ароматность. В своем рецепте Найджила использует 150 гр карамели (кусочки карамели). Когда я готовила этот рецепт,то у меня дома не оказалось карамели, и я решила приготовить этот рецепт, используя только бананы.

Если же вы любите десерты с шоколадным вкусом, то вы можите использовать 150 гр черного шоколада, предварительно порезав его на мелкие кусочки, затем добавьте их в тесто. Также стоит отметить, что Найджила рекомендует использовать подпортившиеся бананы, то есть те, что у вас лежали в фруктовнице в течении нескольких дней, и никто их так и не съел. Мои бананы были свежими, вернее им было уже несколько дней, но с виду они выглядили свежими. Так что я думаю, что для этого рецепта подойдут бананы любой зрелости, а именно те, что оказались у вас дома.
Попробуйте приготовить рецепт этих замечательных маффинов, и я уверена, что вы не разочаруетесь результатом.

Кстати, забыла сказать, что для приготовления рецепта я использовала 150 грамовую баночку греческого натурального йогурта. Это густой сливочный наруральный йогурт без добавок. Он немного жирноват, но именно он отлично подходит для выпечки маффинов. Если же у вас не оказалось греческого йогурта, то замените его на обычный натуральный йогурт, не только не низкокаллорийный. Или же на крайний случай замените на полугустую сметану, я думаю, что 5 ст ложек будет достаточно. Ну забудьте про молоко, оно также придает воздушность тесту.

Чтобы приготовить 14 маффинов, вам понадобится:

250 гр муки
1 пакетик разрыхлителя
100 гр сахара
2 яйца
125 мл растительного, подсолнечного или оливкового масла
3 банана, натереть на терке
150 гр греческого йогурта
3 ст ложки молока

Как приготовить:

В одной чашке смешать сухие ингредиенты : сахар, муку, разрыхлитель.
В другой чашке смешать жидкие ингредиенты : молоко, яйцо, масло, йогурт, тертые бананы.
Соединить вместе жидкие и сухие продукты.
Смазать сливочным маслом формочки для маффинов.
Разложить тесто в формочки, и печь в разогретой духовке при 200 С в течении 25 минут.

Pishki or Russian doughnuts / Pychki ou des beignets russes / Сметанные пышки с медом


English Version

Pishki or Russian doughnuts

The recipe of these Russian doughnuts comes from the cookery book “Russian Cuisine” I bought in St Petersbourg this summer. This book contains so many delicious Russian recipes which I’d like to try… one day.

This weekend I decided to give a try to this lovely recipe of “pishki” or doughnuts which I served with honey. I guess the word “pishki” (‘pishka” in singular ) comes from the word "voluptuousness". Indeed, these doughnuts are voluptuous and round. They are delightful balls of pleasure. They are soft, moist and tender. They are a little bit springy but full of taste.. taste of my childhood when my grandmom made them for me. You bring a doughnut to your mouth and it incredibly melts.
I love them with honey but you can eat them with any sort f your favorite jam: strawberry jam will be really perfect!

These doughnuts are also made with cheese curd (“Tvorog”) in Russia but the recipe I am proposing is so simple and requires the following ingredients: flour, sugar, vanilla sugar, sour cream, eggs, baking powder.

You’ll be surprised how incredibly easy they are to make !

To make 20 doughnuts, you’ll need:

2 cups of flour
3tablespoon of heavy sour cream
2 eggs
3 tablespoons of granulated sugar + a little bit of vanilla sugar
10 gr of baking powder
Extra virgin olive for frying

How to make them:

Whisk together sugar and eggs, then add sour cream. Incorporate flour and baking powder. Mix.
You can use your hands to knead dough.
If you see that your dough is sticky, add some more flour.
On a lightly floured surface knead dough, roll it out and cut circles. I used an espresso cup.
Add olive oil into a frying pan.
Fry doughnuts in a medium heat from both sides until brown golden. It takes less than 1 minute per side.
Once fried, place them on a plate with paper towel to absorb the extra oil.
Sprinkle with icing sugar.

French Version

Pychki ou des beignets russes

La recette de ces beignets russes a été trouvée dans un livre « Cuisine Russe » que j’avais acheté à St Petersburg cet été. Ce livre contient plein de bonnes recettes russes que je souhaite tester ... un jour.

La recette que je vous propose est celle de mon enfance. Ma grand-mère paternelle m’a préparée assez souvent cette délicieuse recette. Ce n’est pas la recette de ma grand-mère mais celle-ci est identique au gout de mon enfance.

Je ne connais pas l’origine de ce dessert, mais à mon avis ce mot « pychki » (« pychka » en singulier) vient du mot « voluptueux » car ces bulls dorés sont vraiment ronds, sensuels, gourmands et savoureux.

Pour les réaliser, vous pouvez trouver tout ce dont vous avez besoin à la maison : la farine, la crème fraiche épaisse, le sucre, le sucre vanille, des œufs et la levure chimique.

Vous serez surpris par cette recette qui est facile à réaliser en weekend pour votre famille.

Pour une vingtaine de beignets, il vous faut :

2 verres de farine
3 c à soupe de crème fraiche épaisse
3 c à soupe de sucre
2 oeufs
1 sachet de sucre vanillé
1 sachet de levure chimique
L’huile pour la friture

Comment faire :

Mélanger le sucre et les œufs ensemble. Y ajouter de la crème fraiche épaisse, puis la farine et la levure chimique.
Bien pétrir pour obtenir une pâte souple et aérée.
Si la pate est trop liquide et collante, ajouter un peu de farine.
Faire une abaisse d'environ 1cm d'épaisseur.
Découper des ronds à l’aide d’un verre à espresso.
Faire dorer dans une friture moyennement chaude, puis égoutter et saupoudrer de sucre glace.

Russian Version

Сметанные пышки с медом

Предлагаю рецепт воздушных пышек с медом. Вкус этих пышек напоминает мне вкус детства, когда моя бабушка мне их готовила на завтрак. Рецепт, который я вам предлагаю, был заимствован из книги «Русская Кухня». Эти пышки готовятся очень быстро, не надо замешивать тесто и ждать час, пока оно подымится. Чтобы пышки получились мягкими и воздушными, в этом рецепте используется густая сметана и пакетик разрыхлителя, то есть сухих дрожжей. Гашеная сода также подойдет для этого рецепта.

Итак, чтобы приготовить 20 пышек, вам понадобится:

2 стакана муки
3 ст ложки густой сметаны
3 ст ложки сахара
1 пакетик ванильного сахара
1 пакетик разрыхлителя или 1 ч ложка соды
2 яйца
Подсолнечное масло для жарки

Как приготвоить:
Растереть сахар с яйцами. Затем добавть сметану, муку, разрыхлитель.
Вымешать тесто.
Если тесто не густое и прилипает к рукам, то добавьте еще немного муки.
Рабочую поверхность посыпать мукой.
Раскатать тесто в пласт толщиной в 1 см.
Затем стаканчиком вырезать круглые лепешки
Как только пончики зарумянятся, вынуть их шумовкой, дать стечь лишнему маслу и обсыпать сахарной пудрой.

Plov or chicken and rice pilaf from Uzbekistan / Plov ou pilaf au poulet et au ris d’Ouzbékistan / Плов из курицы по маминому рецепту


English Version
Plov or chicken and rice pilaf from Uzbekistan

Plov is a traditional dish of Uzbekistan but it is loved and cooked in many countries of ex Soviet Union, like in Russia, Ukraine, Kazakhstan ..

It’s delicious dish which family enjos over the table. It’s mainly done with fat, onion, carrot, rice and meat (lamb, beef or chicken). The recipe I propose is made with chicken. That’s how my mom cooks it and that’s how I love it. If you google, you’ll certainly find different versions of this recipe and all of them are good.
Here is my mom’s recipe:

Serving 6:
2 onions, finely sliced
3-4 carrots, dices
Chicken breasts – 6
3 garlic cloves
Salt, pepper
3 cups of rice
6 cups of hot water
¼ cup of vegetable oil

How to make it:
Place rice in a dish with cold salted water and let it soak for 30 minutes.
Heat the oil in a large fry pan or heavy pot on high heat. Brown chicken breasts. Then add sliced onions and carrots. Stir fry them until they are browned and ready. Add salt and pepper.
Turn the fire to low, and stir for 3-5 minutes.
Place rice. Pour over hot water and bring to boil over a high heat.
Add garlic cloves.
Reduce the heat to low, cover, and simmer for 25 minutes.
The water should be evaporated and the rice should be cooked.
Do not mix rice and chicken.
When the rice is cooked, take off from heat and let it sit for 10 minutes.
Do not forget to remove garlic cloves.

Advice: you can also add 1/4 cup of raisins and ¼ cup of chick peas

French Version

Plov ou pilaf au poulet et au ris d’Ouzbékistan

Aujourd’hui on va cuisiner le plov selon la recette de ma maman.

Le plov, est le plat national ouzbek à base de viande de mouton et de riz et agrémenté d'oignons et d'épices (cumin surtout).
Le plov est connu et aimé non seulement en Ouzbékistan mais dans toutes les républiques de l'ex-URSS.

Il existe une vaste variété de plovs en Ouzbékistan : classiques à la viande (au poulet, comme je vous le propose), ou sucrés aux fruits secs (abricots secs, raisins) La version originale est assez grasse car on met beaucoup d’huile d’olive et de gras de mouton.

La version que je vous propose est celle de ma maman. Selon sa recette le plov n’est pas gras, il est savoureux et gouteux.

Si la réalisation de cette recette ouzbek vous tente, voici les ingrédients pour 6 personnes :

2 gros oignons coupés finement
3-4 carottes coupées en julienne
6 cuisses de poulet
3 gousses d’ail, entières
3 verres de ris
6 verres d’eau bouillante
¼ de verre d’huile végétale
Sel, poivre

Préparation:

Laisser tromper le ris dans de l’eau salée pendant 30 minutes. Rincer bien.
Faire chauffer de l'huile dans une grand casserole ou sauteuse. Sur le feu vif faire sauter le poulet.
Ajouter l’oignon et les carottes. Les faire dorer pendant quelques minutes. Saler, poivrer.
Baisser le feu en continuant à mélanger pendant 3-5 minutes.
Verser le riz en pluie sur le poulet, l’oignon et les carottes.
Secouer le récipient pour mélanger.
Verser l'eau bouillante. L'eau devrait recouvrir le riz et dépasser de deux doigts ou de 3 cm. Porter à ébullition. Baisser le feu.
Mettre les gousses d’ail.
Ne pas mélanger le ris et la viande !
Couvrir et laisser cuire à feu très doux une vingtaine de minutes (entre 20 et 30 minutes) ou jusqu'à ce que le riz soit bien cuit.
Quand le plov est cuit, enlever les gousses d’ail.
Laisser reposer une dizaine de minutes, le feu éteint. Servir chaud.

Russian Version


Плов из курицы

Как давно я не готовила мамин плов. Летом как-то совсем не хочется готовить что нибудь мясное и сытное, обходимся салатами и овощными блюдами. А вот с приходом осени, серых дождливых дней, так и хочется съесть что-нибудь горячего. В данном случае тарелка плова - идеальный спутник осенней прохладной погоды.
Рецепт, который я вам предлагаю, наверное, не совсем похож на настоящий жирный узбекский плов. Я уверена, что настоящий узбекский плов хранить в себе много тайностей приготовления, которые известны только мужчинам, так как женщинам приготовление плова не доверяется.
Мамин плов совсем не жирный, так как он готовится с курицей. Я использовала окорочка.
Делюсь с вами рецептом, он расчитан на 6 человек:

2 луковицы, нарезать на кольца
3 больших марковки, порезать соломкой
6 окорочка
3 стакана риса
6 стаканов горячей воды
Растительное масло - ¼ стакана
Соль, перец
3 головки чеснока, целые

Как приготовить:
Замочить рис в холодной соленой воде на 30 минут. Промыть хорошо.
На горячем растительном масле в казане или в глубокой кастрюле обжарить окорочка до золотистого цвета.
Затем к ним добавить нарезынный лук и морковь. Обжарить вместе с курицей в течении 3-5 минут постоянно помешивая, чтобы лук и морковь не пригарели. Солим, перчим.
Затем добавить рис. Заливаем горячей водой. Рис должен быть покрыт водой на 2-3 пальца. Доводим до кипения. Как вода закипит, убавляем огонь.
Добавляем дольки чеснока.
Закрываем крышкой и тушим в течении 20-30 минут до готовности риса и курицы.
Ни в коем случае не перемешиваем рис и курицу.
Как плов сготовится, убрать дольки чеснока. Снять с огня, закрыть теплым полотенцем, дать настояться 10-15 минут. Подавать горячим !


Russian salad "Olivier" / Salade russe "Olivier" / Салат "Оливье"


English Version

Salad « Olivier »

It’s been a long time since I haven’t posted any Russian recipe and I am really sorry for that as I feel I have to do it more often to share with you the recipes of my childhood and my native country. Autumn is right here with its rainy days and wet weather. On a such cold, cool and grey day we want to eat comfort food. For me Russian salad “Olivier” is an ultimate comfort dish along with Russian beetroot soup “Borsch”.

Today I am proposing you a recipe of my childhood, the famous Russian salad called “Salad Olivier”. This salad is popular in Russia and in all other countries of former-USSR. For me this salad makes part of Russian culinary heritage. This salad is the most traditional dish for the home New Year celebration for Russian people. But this salad can be an everyday meal. You can eat it at a lunch time as this salad has all ingredients you need: meat and vegetables.

This salad is made with meat (boiled chicken or beef or ham) and covered with creamy mayonnaise but if you are on a diet or you are a vegetarian, meat can be replaced by mushrooms and mayonnaise can be replaced by yogurt (plain, for example, I tend to use Greek yogurt) , sour cream or light vinaigrette.

What I love about this salad is the ease of making it. But I have to admit this salad takes some time to prepare it as all ingredients should be firstly cooked and secondly cut into small cubes.
But I hope you’ll enjoy making it on a rainy day when we don’t feel like going out. All we want is eat some comfort food which will make us feel good, happier and less stressed.

Enjoy this delicious and tasty salad as I do !

For those who are interested in the origin and the history of the recipe, please click on the link: http://en.wikipedia.org/wiki/Russian_salad

4-6 portions,

Ingredients:

2-3 potatoes of medium or big size, boiled
2 carrots, boiled
3-4 eggs, boiled
1 onion, peeled and finely sliced
Filet of chicken breast – 400-500 gr (or 1 whole chicken breast, poached, boned, and skinned )
300-400 gr of green peas
100-200 gr of dill pickles (or you can use fresh cucumbers)
Salt, pepper to your taste
5 tablespoons of mayonnaise

Method:

Boil potatoes and carrots. Once they are cooked, let them cool, then slice into small cubes.
Boil eggs. Let them cool. Slice into small cubes.
Cut filet of chicken into cubes.
Brown onion and chicken with 3 tablespoons of vegetable oil until everything cooked.
Cut pickles into the cubes.
In a large bowl place all ingredients. Add salt, pepper and mayonnaise. Mix the salad and refrigerate before serving it.
French Version

Salade « Olivier »

Ca fait longtemps que je ne nous vous ai pas proposé des recettes russes. Avec l’arrivée du froid et de la pluie, c’est maintenant le temps de préparer des plats gouteux et copieux. Voici une des recettes russes qui sera parfaite pour la période hivernale.
C’est une salade composée comme la plupart des salades russes faites de légumes et d’autres aliments liés à la mayonnaise.
La recette que je vous propose aujourd’hui est connue sous le nom «Salade Olivier » en Russie, Ukraine et dans les autres pays de l’ex Union Soviétique.

Si vous êtes intéressé par l’histoire et l’origine de cette recette, voici un lien vers wikipedia :

http://fr.wikipedia.org/wiki/Salade_russe

Je peux juste ajouter une chose : pour moi cette salade fait partie de la gastronomie russe. Cette salade est plus souvent préparée pour les fêtes mais si vous désirez, vous pouvez la faire comme un plat de tous les jours, par cher et bien copieux pour remplir le ventre.

Vous allez voir que la salade »Oliver » ressemble à la salade piémontaise.

J’aime cette salade car elle me rappelle mon enfance. Elle est facile à réaliser, elle demande juste un peu de temps lors de sa préparation. Vous pouvez apporter cette salade sur le lieu de travail car celle-ci contient tout ce qu’il vous faut pour avoir des forces : la viande et des légumes. Bien sur, la salade fera un grand succès lors d’une fête ou d’une célébration.

Pour réaliser cette salade pour 4-6 portions, il vous faut :

2-3 pommes de terre, de grande taille, cuites
2 carottes, cuites
1 oignon
Filet de poulet – 400 – 500 gr (ou 1 morceau de jambon)
1 boite de petits pois -300-400 gr
3-4 œufs durs
100-200 gr de cornichons aigre-doux (6-8 petits cornichons) ou 1 concombre
Sel, poivre
Mayonnaise

Préparation :
Faire cuire les pommes de terre, les carottes et les œufs séparément.
Faire revenir à la poêle l’oignon coupé en dés et le poulet coupé en cubes avec l’huile végétale ou avec un peu de beurre.
Couper toues les ingrédients finement en petits cubes : œufs, cornichons, pommes de terre, carottes.
Dans un grand saladier mettre tous les ingrédients coupés en y ajoutant le poulet et les petits pois. Saler, poivrer.
Placer la mayonnaise (5-6 bonnes c à soupe). Mélanger.
Laisser au frigo avant de la servir : à déguster avec une tranche de pain aux céréales ou une tranche de pain seigle.

Russian Version

Салат Оливье

Не удивлляйтесь увидеть рецепт салата «Оливье» ! Мне просто хотелось поделиться рецептом этого вкуснейшего салата с французо и англо-говорящими любителями русской кухни, которые, возможно, заинтересуются рецептом этого замечательного салатика, и приготовят его у себя дома. Поэтому этот рецепт я посвещаю именно им. Ну, а вы, надеюсь, не нуждаетесь в его рецепте и знаете наизусть, как его приготовить. Уверена, что у каждой русской хозяйки есть своя версия этого рецепта.

Я считаю, что рецепт этого салата поистине относится к российскому кулинарному наследию. Иногда мы о нем немного забываем, готовя рецепты заморских салатов. Но потом снова возвращаемя к истокам, и с новым энтузиазмом крошим и мельчим овощи на «Оливье».

Что мне больше всего нравится в этом салате, так это его сытность. Он сочетает в себе качества второго блюда:сытного,мясного и овощного. Если бы в нем не было майонеза, то его запросто можно было бы разогреть. Салат «Оливье» -практичный: его можно приготовить в большом количестве, и если гости или ваши домочадцы не съели его за раз, то можно будет им подкрепиться на сдедующий день.

Если у вас есть идеи и мысли по поводу этого рецепта, то спешите поделиться ими, буду рада узнать, по вкусу или нет вам этот салат, готовите ли вы его часто или только по праздникам, какие изменения привнесли вы в этот салат ! Буду ждать !

На всякий случай напоминаю рецепт для тех, кто забыл: ))

На 4-6 порции:

2-3 крупных картошки
2 морковки
1 луковица
Филе курицы - 400-500 гр
300-400 гр зеленого горошка
3-4 яйца
100-200 гр соленых огурцов
Соль, перец
Майонез

Картофель и морковь отварить до готовности. Нарезать кубиками.
Отварить яйца. Нарезать кубиками.
Покрошить лук и нарезать курицу на кубики. Обжарить на слив или растительном масле до готовности.
Порезать соленые огурцы.
В салатнице перемешать все ингредиенты. Посолить, поперчить.
Заправить майонезом.