mercredi 5 mai 2010

My Sweet Friends

Happy_101_-_Little_Space_Kristy[1]


For English Readers only:

Dear readers,
I was contacted by my Italian friend Manu (she lives in Milan and loves cooking as I do) who chosen me as her Sweet Friend and passed me the award. I was happy to receive it . Thanks, Manu !
You can find nice and lovely Italian recipes by clicking on her blog:

http://cookingmanu.blogspot.com

Here are the rules:
Copy and paste the award onto your blog.
List who gave the award to you and add a link to their blog.
List 10 things that make you happy.
Pass the award onto other blogs and let them know you have done so.

Now I have to choose another candidate as my Sweet Friend and pass him/her the award. I couldn’t choose only one person/blog. I decided to choose two fabulous cooking blogs I liked to visit and read the recipes and make some of them at home.
My first choice will fall on friend Farida, a young lovely lady of Azerbaijan origin, living in the USA. She loves cooking and makes it so good. The food pictures are so gorgeous. I made her Zebra cake which turned out moist and tender. I’d highly recommend you Farida’s recipe of Honey Cake(called Medovik).Please, have a look at her website and I bet you’ll find so many new interesting recipes you have never done before.

http://www.azcookbook.com/

My second choice will fall on the blog named VEGBOWL. I particularly like this cooking blog dedicated to vegetarian food. The variety of recipes is huge: everybody can find a delicious and simple recipe to make at home. I especially loved the recipe of Roti, Indian bread, which makes me think of Indian restaurant I visited while being on vacation in the Mauritius Island. Please, visit this cooking blog and you won’t be disappointed.

http://vegbowl.blogspot.com/

Now it’s my turn to name 10 things which make me happy.
1. My family and knowing that everybody is healthy
2. My friends and emails from them
3. My adorable cat Titi
4. Travelling and discovering new places
5. Cooking, cooking, cooking
6. Buying books, especially cooking books
7. Taking cooking classes
8. My cooking blogs and comments from my readers
9. Knowing that there are no accidents or catastrophes in the world
10. TV: yes, I love watching Desperate Housewives and culinary TV shows
I guess I can go on with the list. There are so many things which make me happy. So, I can say I am a happy person and you?
mercredi 28 avril 2010

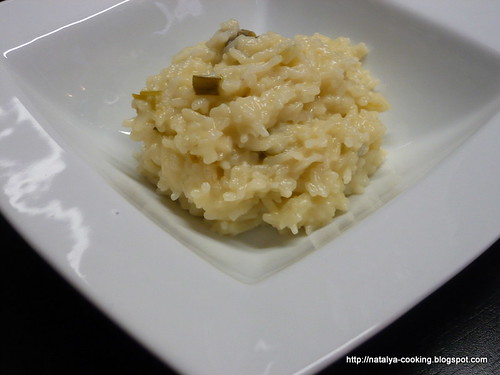
Cheddar cheese risotto / Risotto au fromage cheddar / Ризотто с сыром «шедар»

P1100615

P1100577

P1100582

P1100583

P1100586

P1100588

P1100591

P1100595

P1100598

P1100600

P1100610

English Version

Cheddar cheese risotto

Adapted from Nigella’s recipe

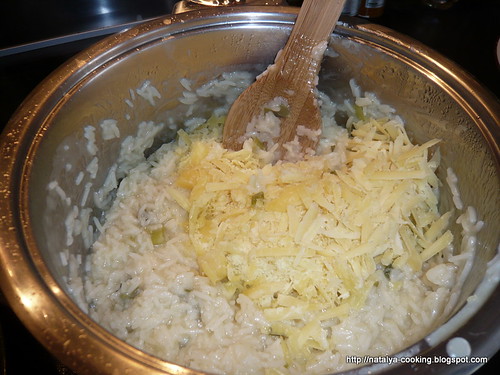
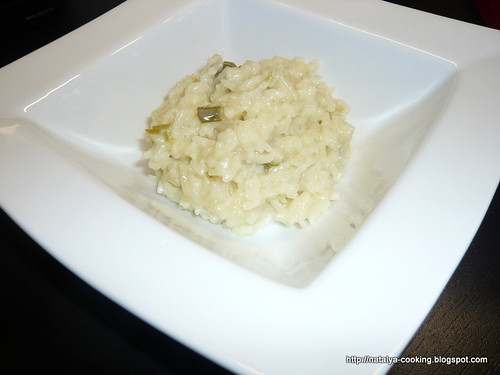
I love risotto, I am a big fan of it in any of its forms. For me Nigella’s cheddar cheese risotto is a comforting, creamy, filling, sludgy risotto with a good taste of cheddar. I enjoyed it making as well as eating it.
In her recipe Nigella suggests to sprinkle risotto with some chopped chives . As for me I didn’t use them.
As for the wine, you can use any white dry wine. I used an ordinary white wine which is available at any supermarket.
Here in France cheddar is not easily found in supermarkets like Auchan or Carrefour। I had to go to “Halles de Lyons”, food covered market in the Part-Dieu area, a very famous pace in Lyon where you can find all sort of products. I bought a good hunk of it paying 38 euros per 1 kg. I have never tried cheddar before and this time I wanted to buy an authentic British cheddar cheese to make this recipe. I liked its sharp and naturally aged taste.

Serves 4:
50 gr of butter
2-3 tablespoons of oil
2 of spring onions, finely sliced
400 gr of risotto rice (I didn’t have risotto rice and used ordinary one)
1 cup of white wine
1/2 teaspoon of Dijon mustard
1 litre of vegetable stock ( I used a Knorr vegetable stock cube)
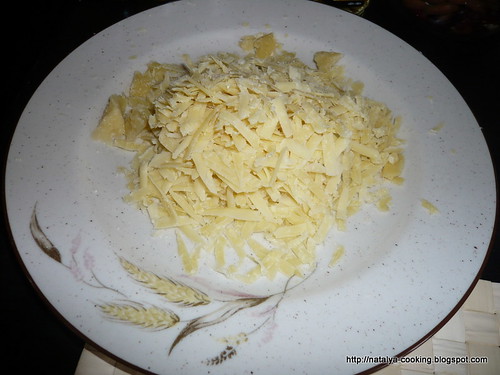
130 gr of Cheddar, raped
3 tablespoons of chopped fresh chives (optional, I didn’t use them)

DIRECTIONS:
STEP 1:
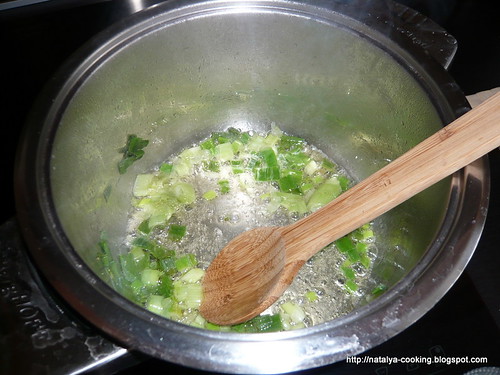
Melt butter and olive oil in a saucepan over medium heat.
STEP 2:
Stir in onions and for a couple of minutes, or until softened.
STEP 3:
Add rice and cook for another 3 minutes, stirring constantly, until lightly toasted.
STEP 4:
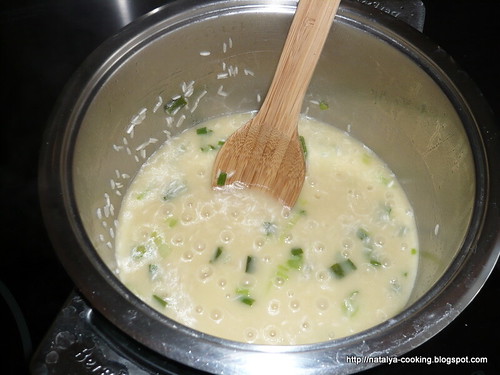
Add white wine and allow it to simmer. Add mustard.
STEP 5:
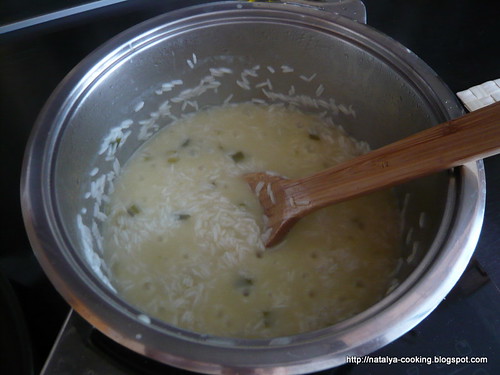
Pour in half the stock. Stirring all the time, gently bring to the boil, then turn the heat down and simmer until almost all the stock has been absorbed. Add the rest of the stock a ladleful at a time until the rice is cooked.
STEP 6:
Before rice is completely coked, add grated cheddar cheese. Mix.
STEP 7:
Check the seasoning and add salt and pepper if needed.
STEP 8:
Place risotto in serving bowls and it is ready to be served.

French Version

Risotto au fromage cheddar

Selon la recette de Nigella

Je vous propose une recette d’un bon risotto crémeux au fromage britannique – le cheddar.
Le fromage cheddar est un fromage jaune pâle au goût prononcé। Il est originaire du village anglais de Cheddar dans le Somerset (Angleterre). Ce fromage est difficile de trouver dans les grandes surfaces. Je l’ai trouvé aux Halles de Lyon (c’est une marché couvert regroupant une soixantaine de commerçants, installé 102 cours Lafayette à Lyon 3e). Son prix est assez élevé : de 38 à 45 euro/kg. Il est parfumé et fort en gout avec un léger gout de cave. Il me fait penser à la tomme de Savoie. Vous pouvez replacer le cheddar par le cantal ou le parmesan. Quant au vin, il faut aller vers un vin vif et rafraîchissant comme un Riesling ou un Sauvignon. J’avais le vin blanc sec de table qui s’accordait bien avec le risotto.

Pour 4 personnes :
50 gr de beurre
2-3 c à soupe d’huile
2 ciboules, finement coupés
400 gr de riz arborio
1 verre =250 ml de vin blanc
½ c à soupe de moutarde de Dijon
1 litre de bouillon de légumes
130 gr de cheddar, râpé

Comment faire:
ETAPE 1:
Coupez finement les ciboules.
ETAPE 2 :
Faites revenir les ciboules coupées dans une sauteuse avec un peu de beurre et d'huile d'olive. ETAPE 3 :
Versez ensuite le riz qui doit devenir translucide. Remuez bien.
ETAPE 4 :
Mouillez avec le vin blanc et ajoutez la moutarde.
ETAPE 5 :
Quand il est absorbé, ajoutez le bouillon de légumes louche après louche en attendant que la louche précédente soit absorbée, jusqu’à ce que le riz soit bien tendre.
ETAPE 6 :
Vers la fin de cuisson ajoutez le cheddar râpé. Remuez pour bien lier le mélange.
ETAPE 7 :
Vérifiez l’assaisonnement. Salez et poivrez si nécessaire.
ETAPE 8 :
Disposez le risotto dans les bols individuels et servez aussitôt।

Russian Version

Ризотто с сыром «шедар»

По рецепту Найджилы Лоусон

Я очень люблю ризотто, как и многие другие блюда из итальянской кухни। Сегодня мы будем готовить ризотто с британскими нотками. Мы будем готовить ризотто с британским сыром под названием «шедар». Это сыр твердого типа, происходит из деревни Шедар, находящейся в графстве Сомерсет на юго-западе Англии. Его делают на основе коровьего молока.Но если вам сложно приобрести шедар, то замените его на любой сыр твердого типа. В качестве бульона можно использовать овощной или куриный. Я использовал 1 кубик овощного бульона Кнор. В качестве вина подойдет любое несладкое белое вино. Ризотто готовится быстро, за 20 минут ваше блюдо будет готово, но придется от него не отходить, так как нужно будет добавлять постепенно горячий бульон по мере того, как бульон будет впитываться в рис.

Так что записывайте список продуктов

Рецепт рассчитан на 4 порции:
50 гр сливочного масла
2-3 ст ложки оливкового или растительного масла
2 пучка зеленого лука
400 гр риса
1 стакан белого несладкого вина
½ ч ложки Дижонской горчицы или любой другой
1 литр горячего овощного бульона
130 гр тертого на крупной терке сыра шедара или любого другого сыра твердого типа

Как приготовмить:
ШАГ 1:
Порезать лук на мелкие колечки.
ШАГ 2:
Обжарить лук до готовности в раскаленном оливковом и сливочном масле в кастрюле.
ШАГ 3:
Добавьте в кастрюлю рис и хорошо перемешайте. Готовьте 2-3 мин.
ШАГ 4:
Добавьте вино, затем горчицу, помешайте пару раз и готовьте еще 1-2 минуты, чтобы вино впиталось.
ШАГ 5:
Постоянно помешивая, вливайте бульон по мере того, как он будет впитываться в рис.
ШАГ 6:
3а 1 минуту до готовности риса, добавьте потертый сыр.
ШАГ 7:
Посолите, поперчитне на ваш вкус.
ШАГ 8:
Ризотто готово к подаче !

mercredi 21 avril 2010

Soupe à l'oignon / French Onion Soup / Французский луковый суп

P1100293

P1100233

P1100236

P1100244

P1100276

P1100291


French Version

Soupe à l'oignon

Cette recette vient du livre « Aimer la cuisine des bouchons de Lyon « de Emmanuel Ferra
(Bouchon Le Garet )

pour 6-8 personnes, il vous faut :

200 gr d'oignons = 3 oignons
50 gr de beurre
1 verre de vin blanc
2 cubes de bouillon de poule = 1,5 l d'eau
tranches de pain
gruyère râpe

Comment faire :

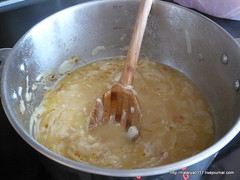
Mettre dans une casserole le beurre, faire revenir les oignons coupés en tranches
Remuer toujours à la spatule jusqu'à obtenir une coloration d'un blond foncé
Déglacer au vin blanc, laisser réduire.
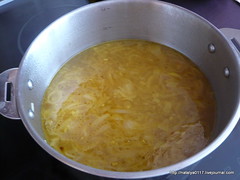
Ajouter le bouillon de poule. Porter à ébullition.
Faire baisser le feu, saler et laisser bouillir 15 minutes
Servir avec du pain toasté et du fromage râpé


English Version

French Onion Soup with toasted bread and grated cheese

Today I am proposing you the recipe of a savory, comforting and warm french onion soup. The recipe comes from the book « Aimer la cuisine des bouchons de Lyon « de Emmanuel Ferra (« Love for the cuisine of Lyons’ bouchons » written by Emmanuel Ferra (Bouchon Le Garet )

Here is the restaurant’s address :
Le Garet
7, Rue du Garet,
69001 Lyon

What is it Lyon’s bouchon ? Is is a small restaurant where one can eat popular Lyons’ specialties.

Here is the recipe of the soup:

Serves 6-8
200 gr of onions = 3 onions
50 gr of butter
1 glass of white wine
2 cubes of chicken broth=1.5 l of water
Salt, pepper to your taste
Some slices of toasted bread
Some grated cheese

How to make it:

In a large, heavy bottomed pot, melt the butter over medium-low heat.
Add the cut onions and cook for about 10-15 minutes on medium heat.
Add white wine and reduce the liquid to about half of its original volume at low heat.
Add the chicken stock and increase the heat to high.
Season with salt and pepper.
Bring the soup to a boil, and then reduce the heat to low and simmer, partially covered, for about 15 minutes.
In the meantime, grate cheese and sprinkle it on each toasted slice of bread. Place under a low broiler setting until cheese is slightly browned.
To serve, ladle the soup into soup bowls. Place the taste bread on it and serve immediately.


Russian Version

Французский луковый суп с гренками и сыром

Рецепт на русском языке доступен на моей новой кулинарной страничке на ЖЖ

mercredi 14 avril 2010

Nouvelles /News / Новости

Nouvelles que pour les russophones
News only for Russian speaking
Новости для моих русских читателей

ВОТ ТАК НОВОСТИ !

МОЯ НОВАЯ КУЛИНАРНАЯ СТРАНИЧКА НА ЖУРНАЛЕ ЖЖ

Дорогие мои читатели ! Обращаюсь к вам, если вы заходите на мой кулинарный блог и читаете, а может быть, и пробуете приготовить мои рецепты у себя дома। Спешу вам сообщить, что с совсем недавнего времени я открыла новый блог на ЖЖ ( Живой Журнал), который посвящен исключительно французской кухне। Рецепты, которые вы там встретите, написаны только на русском языке и рассчитаны на русскоговорящих, а то есть на вас, мои дорогие читатели। Идея завести новый сайт и публиковать на нем только французские рецепты вынашивалась во мне давно, но все не хватало времени заняться этим делом всерьез. У моей бывшей однокурсницы Натальи имеется своя страничка на ЖЖ, и гляда на нее, я тоже решила открыть там свою новую кулинарную страничку. Но не переживайте, мой блог на blogspot.com будет продолжать существовать и, я буду с радостью пополнять его новыми рецептами. Некоторые французские рецепты я буду размещать и на моем уже имеющемся блоге, то есть на natalyacooking, на 3х языках: на английском, французском, и русском. Так что теперь у вас появится возможность следить за моими кулинарными приключениями аж на 2х блогах. Вам, наверное, не терпится узнать адрес моей новой странички. Записывайте, присоединяйтесь и следите за мной на:

http://natalya0117.livejournal.com/

Для того, чтобы оставить комментарий на моем новом блоге , возможно, вам придется зарегестрироваться. Надеюсь, что вас это не остановит !!! Регистрация занимает всего 2-3 минуты, как обычная регистрация на любой другой вебсайт. Зарегестрировавшись там, и послав мне предложение «дружить», на которое я с удовольствием отвечу положительно, вы сможите быть в курсе всех моих новых опубликованных сообщений. Ну это еще не все. Вы также сможите открыть для себя новый мир - мир журнала ЖЖ, на котором вы сможите встретить много интересных людей, которые делятся своми мыслями на те или иные темы:кулинарию, музыку, политику, спорт и так далее.

Так что советую всем зарегестрироваться на livejournal.com, и жду ваших комментариев !!!!


До скорой встречи !

jeudi 1 avril 2010

Dessert russe au fromage blanc / Russian cottage cheese dessert / Творожная масса на Пасху

French Version
Dessert russe au fromage blanc et aux abricots secs, pruneaux, amandes et raisins secs
Le weekend de Pacques arrive et j’ai pensé à un autre plat sucré qu’on prépare habituellement pour Pâques Orthodoxe। Il s’agit d’un gâteau « Paskha » mais revisité à ma façon।

Comme le « Koulitch », le Paskha est incontournable pour fêter Pâques russe. C’est un gâteau compact et sucré à base de fromage blanc (« on dit « tvorog » en russe ) et des fruits confits. On le fait dans un moule en forme de pyramide. Malheureusement je ne trouve pas du « tvorog » en France ainsi qu’un moule en forme de pyramide.

Le «tvorog » est un fromage blanc russe. Il est toujours frais, son aspect est plutôt grumeaux. On peut le replacer par la ricotta, le mascarpone, la brousse, le petit suisse, la faisselle ou le fromage blanc à 40 % MG. Pour moi le « tvorog » ressemble plutôt à la brousse. On utilise le « tvorog » pour garnir les « blinis » (les crêpes russes) , les « pirojkis « ( les petits pâtés) ou les « vareniki » (les raviolis russes).

Quant à moi, j’ai utilisé le petit suisse à 3.8 % MG.

Ce dessert est très facile à faire : il suffit de mélanger tous les ingrédients ensemble et réfrigérer le dessert 24 heures avant de servir. Mais vous pouvez pleinement profiter de ce crémeux et délicieux dessert toute l’année : on peut le consommer le matin avec des fruits frais pour le petit déjeuner.

Essayez-vous à ce dessert russe et vous ne serez pas déçu !

Pour 6-8 personnes :

750 gr de petits suisses à 3.8 MG
1 pot de yaourt grec - 150 gr ou de crème fraiche épaisse
50 gr de beurre ramolli
2 sachets de sucre vanillé ou quelques gouttes d’extrait de vanille
2 c à soupe de miel liquide
50 gr d'abricots secs coupés en petits dés
50 gr de pruneaux coupés en petits dés
50 gr de raisins secs
50 gr d'amandes (préalablement grillées à la poêle sans matières grasses)

Comment faire :

Égoutter le fromage dans une passoire.
Battre légèrement le sucre vanillé et le beurre. Ajouter au fromage.
Incorporer le miel.
Ajouter tous les autres ingrédients : les amandes, les raisins, les pruneaux, les abricots.
Mélanger bien.
Recouvrir un moule de papier alimentaire.
Verser le tout dans un moule.
Mettre un poids et réfrigérer 24 heures avant de démouler.
Avant de servir, laisser à la température ambiante pendant 15-30 minutes.

English Version

Russian cottage cheese dessert with dried apricots, prunes, raisins and almonds

The Easter weekend is coming shortly and if you have not decided yet what to serve for Easter, I am proposing you the recipe of Russian cottage cheese dessert which is incredibly easy to make. The recipe I propose was inspired by Russian Easter dish called “Paskha” ( it’s the Russian word for Easter).

“Paskha” is a pyramid-shaped dessert served for Easter in the Eastern Orthodox homes of Russia, Belarus and Ukraine and in many other republics of the former Soviet Union.

Here in France I can’t find an authentic Russian cottage cheese called “tvorog” as well as a special mold in a pyramid-shape. That’s why I decided to make a simplified uncooked version of this delicious Easter dessert.

Everybody can make it: you just mix all ingredients together, place it in the fridge and it’s done.

Moreover, it can be eaten not only at Easter time but you can enjoy it all over the year: you can have a bowl of this dessert with fresh fruits for your breakfast every day!

Try this recipe to make your own cottage cheese dessert!

Serves, 6-8
750 gr of cottage cheese (farmer’s cheese)
150 gr of Greek yogurt or sour cream
50 gr of unsalted butter at romm temperature
2 tablespoons of honey
3-4 tablespoons of vanilla sugar or some drops of vanilla extract
50 gr of chopped dried fruits (I used dried apricots)
50 gr of chopped prunes
50 gr of raisins
50 gr of pan-fried almonds

How to make it :
Place cottage cheese in a mixing bowl and beat well with a wooden spoon.
Beat sugar and butter together. Incorporate into cottage cheese.
Add honey. Mix.
Stir in chopped dried fruits, almonds, raisins, prunes. Mix.
Line an appropriate container with plastic wrap, leaving some centimeters overhang on all sides. Spoon cheese mixture into mold, then fold ends of plastic wrap over top.
Put weights on top. Chill at least 24 hours.
When you plan to eat it, remove weights from mold and open plastic wrap.
Put the dessert on a serving plate and let stand at room temperature 15-30 minutes.

Russian Version

Творожная масса с абрикосами, черносливом, миндалем, изюмом на Пасху

На носу Пасха. Как и каждый год я пеку куличи на пасхальное воскресенье, но в этом году мне захотелось порадовать себя и близких каким-нибудь новым рецептом,и я подумала о том, почему бы не приготовить творожную пасху.

Перечитав всевозможные рецепты, я подумула, что ну не выйдет у меня настоящей русской пасхи без настоящего русского творога. Да, и формочки в виде пирамиды у меня нет. Во Франции, как и в других странах, не найти настоящего русского творога. Ну нет здесь ничего подобного. Странно, конечно. Во Франции каких только нет молочных продуктов, ну а произвести творог, похожий на русский, они еще не додумались. Вроде бы и нет ничего сложного: творог- белковый кисломолочный продукт, получаемый в результате сквашивания молока с последующим удалением сыворотки (из википедии).

Поэтому, во Франции не так то просто приготовить те же самые творожники или ленивые вареники. Конечно, мы здесь умудряемся найти нашему русскому творогу достойную замену, и употребляем вместо него либо французский творог под названием fromage blanc (что означет «белый сыр» ), либо прованский сыр brousse («брус») из козьего или коровьего молока, либо итальянскую ricotta («рикотта»).

Я же решила использовать французский творог под навзванием petit-suisse («пёти суис» ), что означет «маленький швейцарец».Это несоленый творог, похож по консистенции на что-то между сметаной и йогуртом, нежный на вкус, делается из коровьего молока и бывает разной жирности. Вот именно его я и использовала в приготовлении своего праздничного десерта, который, конечно же, по свой форме никак не походит на традиционную пасху.

Так как у меня не было формочки в виде пирамиды, я использовала обычную силиконовую квадратную формочку, а также небольшую круглую салатницу. Простояв ночь в холодильнике, мой пасхальный десерт застыл, и на утро я смогла без проблем вынуть его из формочек.

То, что у меня получилось, вы видите на фотографиях. Я подумала о том, что не стоит ждать Пасхи целый год, чтобы отведать этого замечательно десерта. Его можно готовить почаще и наслаждаться им по утрам во время завтрака со свежими фруктами. что я и делаю всю эту неделю, предшествующую Пасхе. Попробуйте и вы !

Итак, на 6-8 порций, вам понадобится:
750 гр творога ( я использовала французский творог petit-suisse )
150 гр греческого йогурта или густой сметаны
50 гр сливочного масла комнатной температуры
2 ст ложки жидкого меда
3-4 ст ложки ванильного сахара или несколько капель ванильного экстракта
50 гр сушеных абрикосов, порезанных на мелкие кусочки
50 гр чернослива без косточек, порезанного на мелкие кусочки
50 гр изюма
50 гр обжаренного на сухой сковороде миндаля

Как приготовить:
Займитесь творогом: дайте лишней жидкости стечь.
Растереть и легко всбить сахар и масло. Добавить в творог.
Добавить мед. Перемешать.
Затем добавить все остальные ингредиенты. Перемешать.
Положить пищевую оберточную бумагу в форму, оставив несколько сантиметров бумаги по краям.
Выложить творожную массу в форму.
Поместите пресс на массу.
Поставить в холодильник на сутки.
Перед подачей выньте творожную массу из холодильника и оставьте принять комнатную температуру в течении 15-30 минут.

mercredi 31 mars 2010

Salade d’orzo aux légumes verts "Primavera" / Pasta Salad "Primavera" / Салат «Примавера»


French Version

Salade d’orzo aux légumes verts « Primavera » de Nigella

Si vous avez envie de repas froid bien équilibré et savoureux et donc de salades, je vous propose une simple et bonne recette d’une salade aux pâtes grecs « orzo » et aux légumes verts. Cette salade est très facile à réaliser et elle vous fera tout le repas car elle contient tout ce qu’il vous faut : les féculents et les légumes. Cette salade aux couleurs vertes va vous régaler en pique nique ou en repas de midi.

Pour cette recette vous avez besoin des légumes verts mais vous pouvez varier les légumes en utilisant les légumes de votre choix. Le petit plus de toute la saveur de cette salade est sa sauce composée d’huile d’olive et de jus de citron et parfumée au basilic et au persil. La recette originale a été réalisée par Nigella Lawson. Quant à moi, j’ai légèrement modifié sa version tout en gardant l’esprit estival de cette délicieuse et fraiche salade.

Pour 8-10 personnes, il vous faut :
500 gr de pâtes « orzo » ( ou d’alphabets )
500 gr d’asperges vertes (j’ai utilisé les asperges congelées car ce n'est pas la saison des asperges fraiches)
300-500 gr d’haricots verts
300-500 gr de mangetout ou des pois gourmands
250 gr de flageolet (en boite)

La sauce :
4 c à soupe d’huile d’olive de bonne qualité
2 c à soupe d’huile d’olive à l’ail
Jus d’1 citron
Basilic, persil
Sel, poivre

Comment faire :
Dans une casserole d'eau bouillante salée, cuire les pâtes de 10 à 15 minutes ou jusqu'à ce qu'elles soient al dente. Bien égoutter et refroidir.
Laver les légumes. Les couper en morceaux. Faire les cuire dans une grande casserole d’eau bouillante salée. Bien égoutter et refroidir
Dans un récipient préparer la sauce : mélanger les huiles d’olives, le jus d’1 citron. Y ajouter les herbes. Saler et poivrer.
Dans un grand saladier disposer les pâtes et les légumes cuits. Verser y la sauce. Bien mélanger.
Laisser refroidir au frigo pendant 2 heures avant de servir.

English Version


Pasta Salad Primavera

Adapted from Nigella Lawson

Today we are going to make a bright green-colored flavored and tasty pasta salad। This recipe was chosen as the recipe of March’s Cookalong Challenge on Nigella’s forum. I was happy to make it as this salad brings some freshness and the taste of spring. It is a wonderful variation from the standard pasta or rice salads. In this recipe Nigella uses teeny-tiny orzo pasta which brings me back to Greece where I discovered it. It is the pasta in the shape of rice but a little bit bigger. If you cannot find it, replace it by any type of pasta of small shapes.
For me this salad should be oily in its character. The dressing is essential. Do not use any store-bought dressing and no mayonnaise. Good olive oil and lemon juice is all you need to flavor this salad. You can also use tender herbs such as chives, dill, mint, basil and parsley. All these magic ingredients will make a really good pasta salad.

Here is the list of ingredients you’ll need to make this salad for 8-10 portions:

500g r of packet orzo
500g of fine asparagus ( I used frozen ones)
300-500 gr of French beans
300-500 gr of mangetout (snow peas)
250 gr of flageolet beans ( I used canned ones)

Dressing:
4 tablespoons of oilive oil of good quality
2 tablespoons of garlic-infused oil
Juice of 1lemon
Herbs of your choice ( I used parsley and basil)
Salt, pepper to your taste

How to make it :

Bring a large pot of salted water to a boil। Add the pasta and cook as label directs (approximately 10-15 minutes).
While the pasta is cooking, prepare your vegetables: wash them up and chop.
Cook the vegetables in salted water. Drain and let cool.
Once the pasta is cooked, drain and rinse it in cold water in a colander. Let cool.
Make a dressing: combine olive oil, lemon juice and herbs.
Place cooked ingredients in a large mixing bowl adding the dressing last. Mix everything.
Refrigerate 2 hours before serving.

Russian Version

Салат из греческих макарон «орзо» и зеленых овощей под названием «Примавера»

Не смущайетесь при прочтении названия этого салата. На самом деле, это очень простой весенне-летний салат, который готовится очень быстро, и самое главное, полезен благодаря своим овощам, входящим в его состав. Рецепт этого салата был выбран рецептом месяца марта на форуме сайта www.nigella.com. Все желающие могли приготовить этот салат и поделиться своми впечатлениями. В состав этого салата входят макароны «орзо». Вы спросите, что это такое и с чем его едят ? Я уже упомянала слово «орзо» в своем рассказе о моем рутешествии в Афины. Так вот слово «орзо» означет мелкие макаронные изделия размером с рисовым зерном. Если вам сложно найти этот греческий продукт, то замените его на любые мелкие макаронные изделия, или на рис. Помимо «орзо» и овощей, для меня в этом салате главным компонентом является хороший соус или заправка. Соус к этому салату готовится очень просто: берем оливковое масло хорошего качества, а также оливковое масло со вкусом чеснока и сок одного лимона. Все перемешиваем и ваш ароматный соус готов. Не забудьте добавить травы на ваш вкус: лук-резанец, укроп, базилик, петрушка, мята. Из всех трав и зелени я предпочла пертушку и базилик, которые отлично приправили своей ароматностью салат.

Итак, чтобы приготовить этот замечательный салат на 8-10 порций, вам понадобится:

500 гр «орзо» (или замените на любые мелкие макаронные изделия)
500 гр зеленой спаржи (я использовала замороженую, так как сейчас в продаже не найдешь свежей спражи)
300-500 гр зеленой фасоли
300-500 гр молодых стручков зеленого горошка (по французски их называют mangetout, что означает «ешь все». Они представляют из себя плоские зеленые стручки без горошин. Их можно заменить на зеленый горошек )
250 гр овощной фасоли Флажеоле

Соус:
4 ст ложки оливкового масла
2 ст ложки оливкового масла со привкусом чеснока
Сок 1 лимона
Базилик и петрушка
Соль, перец по вкусу

Как приготовить:

Отварить «орзо», как указано на упаковке. Слить и дать остыть.
В это время промойти овощи под холодной водой и порежьте на кусочки. Отварите их до готовности в подсоленой воде. Слить и дать остыть.
Приготовье соус: смешать оливковое масло , оливковое масло со вкусом чеснока и сок одного лимона. Добавить зелень. Посолить, поперчить.
Выложить макароны и сваренные овощи в большую салатницу.
Заправить соусом и все хорошо перемешать.
Поставить в холодильник на 2 часа.

jeudi 25 mars 2010

Salades / Salads / Салатики


French Version

Salades

Ce weekend je suis tombée sur deux photos prises il y a plus que de deux ans.
A cette époque là j’étais fan des salades savoureuses mais simples et faciles à réaliser.
Je vous propose des recettes de ces deux salades gourmandes et estivales faites en clin d’œil.

Salade aux tomates et aux copeaux de parmesane

Pour 4 personnes :

1 sachet de salades de votre choix (laitue, roquette, mesclun)
4-6 tomates rouges
150 gr de parmesan (non râpé)
Sauce vinaigrette

Nettoyer puis essorer les feuilles de salade. Réserver les dans un grand saladier.
Nettoyer les tomates puis couper les.
Découper de fins copeaux du bloc de parmesan à l’aide d’un économe.
Ajouter au saladier contenant la salade les tomates.
Ajouter la sauce vinaigrette.
Décorer la salade avec des copeaux de parmesan.

Salade aux poires, au compté et aux pignons de pin

Pour 4 personnes :

1 sachet de salades de votre choix (laitue, roquette, mesclun)
4 poires
150 gr de compté (ou de roquefort)
50 gr de pignons de pin
Sauce vinaigrette

Couper le fromage en dés. Réserver.
Couper les poires en fines lamelles.
Faire brunir les pignons de pin dans une poêle bien chaude (sans matière grasse).Réserver.
Mettre la salade dans les assiettes, assaisonner avec la vinaigrette puis disposer le fromage les poires et enfin les pignons de pin.
Servir aussitôt.


English Version

Salads

This weekend I came across two pictures taken more than two years ago. At that time I was a big fan of fresh, simple and savory salads. Here below you’ll find the recipes of these two summary and tasty salads made in no time !

Tomato and Parmesan Salad

Serves 4:

2-3 bunches of fresh large leaf rocket or any other salad
4-6 tomatoes cut into slices
150gr of parmesan cheese, shaven
Vinaigrette sauce or olive oil

In a large serving bowl, combine rocket and tomatoes. Drizzle with vinaigrette sauce or olive oil.
Garnish with parmesan cheese.


Pine nuts, cheese compté and peaches salad

Serves 4:
2-3 bunches of fresh large leaf rocket or any other salad
4 peaches cut into thin slices
150 gr of cheese compté or blue cheese roquefort, cut into small cubes
50 gr of pine nuts
Vinaigrette sauce or olive oil

Heat a frying pan over medium heat, cook pine nuts, stirring for 2 minutes or until toasted and golden, transfer to a plate.
In a large serving bowl, combine rocket and peaches. Drizzle with vinaigrette sauce or olive oil.
Garnish with pine nuts.


Russian Version

Салатики по-быстрому

На этих выходных я перебирала свои фотографии, и случайно нашла две фотографии, снятых больше, чем два года назад. На этих фотографиях изображены два простеньких, но вкусных салата, сделанные из свежих и летних продуктов. Попробуйте и вы !

Салат из помидор и сыра пармезан

На 4 порции:

листься зеленого салата
4-6 свежих помидора
150 гр итальянского сыра пармезан или любого другого сыра твердого типа
4-5 ст ложки соуса «винегрет « или оливкового масла

Промыть листься салата под холодной водой.
Положить листья салата в салатницу.
На них выложить порезанные помидоры и тертый на крупной терке сыр.
Посолить, поперчить по вкусу.
Заправить оливковым маслом или соусом «винегрет».

Салат из кедровых орешек, французского сыра «компте» и груш

На 4 порции:

листься зеленого салата
4 свежих груши
150 гр французского сыра «компте» или любого другого сыра твердого типа
4-5 ст ложки соуса «винегрет « или оливкового масла
50 гр кедровых орешков

Промыть листься салата под холодной водой.
Положить листья салата в салатницу.
Обжарить орешки на сковороде без масла до золотистого цвета.
Порезать груши на небольшие дольки.
Порезать сыр на кубики.
Выложить груши и сыр на листься салата.
Посолить, поперчить по вкусу.
Заправить оливковым маслом или соусом «винегрет».
Украсить кедровыми орешками.

Gâteau à la clémentine / Clementine Cake / Мандариновый пирог со вкусом миндаля


French Version

Gâteau à la clémentine


Selon la recette de Nigella Lawson

Je n’ai jamais pensé qu’on peut cuire les clémentines. Et oui, ca marche. Pour réaliser cette recette, il faudra les cuire à feu doux pendant deux heures. Ensuite on les mixe et on incorpore tous les autres ingrédients. Simple, n’est ce pas ? C’est un savoureux gâteau à la texture légère et fondante, sans farine et matières grasses. Je vous invite à tester vous-même ce délicieux gâteau très facile à réaliser !

Pour 6-8 personnes :

Ingrédients :
4 à 5 clémentines
6 œufs
225g de sucre semoule (j’ai mis que la moitié)
250g de poudre d'amandes (j’ai utilisé 200 gr de poudre d’amandes et 50 gr de noix de coco râpé)
50 gr d’amandes entières (facultatif)
1 cc de levure chimique

Préparation :

Mettre les clémentines entières dans une grande casserole d'eau.
Porter à ébullition et cuire pendant 2 heures jusqu'à ce que des clémentines deviennent tendres.
Après ce temps, égoutter les clémentines, les laisser refroidir un peu.
Les séparer en deux et enlever les pépins.
Dans un bol d’un robot, mettre les clémentines ainsi que tous les autres ingrédients, bien mixer.
La pâte doit être homogène, les clémentines totalement mixées et incorporées à la masse.
Beurrer le moule à gâteau.
Y verser la pâte.
Enfourner à four préalablement préchauffé à 180°C pendant environ 45 minutes à 1h.
Vérifier la cuisson avec une lame de couteau, elle devra ressortir propre sans accrocher.
Une fois le gâteau cuit, le laisser refroidir totalement dans son moule posé sur une grille.
Démouler le gâteau uniquement après complet refroidissement.

Conseil de Nigella : on peut remplacer les clémentines ou les mandarines par les oranges ou les citrons.

English Version

Clementine Cake

Adapted from Nigella Lawson

I love clementines but I have never thought of baking with them. This flourless and a five-ingredient recipe is absolutely fabulous. The cake turned out moist and fluffy. It was successful and easy to make. Give this amazing recipe a try!

INGREDIENTS:

4-5 clementines
6 eggs
225g sugar (I used only half of it)
250g ground almonds ( I used 200 gr of ground almonds + 50 gr of ground coconut )
50 almonds (optional)
1 heaped teaspoon of baking powder

How to make it:

Wash the clementines carefully in hot water. Place in a saucepan and cover with cold water. Bring into a boil and simmer on a low heat for about 2 hours, until the clementines are soft.
Drain the clementines and cool a little.
Cut into halves, remove any seeds.
Place the clementines into a food processor and blend into a purée.
Whisk the eggs and sugar into a thick and pale foam.
Blend ground almonds with baking powder, then fold into the egg foam.
Then gently fold into the rest of the ingredients.
Pour the batter into a buttered and lined cake tine.
Bake in a preheated 180 C oven for about 45 minutes, until the cake is golden brown on top.

Advice of Nigella: You can make this cake with an equal weight of oranges and with lemons.

Russian Version

Мандариновый пирог со вкусом миндаля

Если вам хочется испечь что-нибудь вкусненькое, то предлагаю вам простой и вкусный рецепт из доступных продуктов.

Предлагаю вам приготовить нежный, мягкий и ароматный пирог из мандарин по рецепту Найджилы Лоусон. Пирог готовится без муки. Вам понадобятся всего лишь 5 ингредиентов: мандарины, яйца, сахар, молотый миндаль, сода или разрыхлитель. Так как пирог не содержит ни масла, ни муки, то он получается воздушным и легким. Попробуйте приготовить этот замечательный рецепт, и вы не разачаруетесь ! Результат гарантирован!

Итак, вам потребуется (на 6-8 порций):

4-5 штук мандарин
225 гр сахара (я использовала половину)
250 гр молотого миндаля ( я использовала 200 гр молотого миндаля и 50 гр кокосовой стружки)
50 гр целого миндаля (не обязательно)
1 ч ложка соды или разрыхлителя

Как приготовить:

Помыть мандарины и положить их в кастрюлю, накрыв их большим количесовм воды.
Довести до кипения, убавить огонь и варить на медленном огне в течении 2 часов до того момента, как мандарины станут мягкими. Они должны легко протыкаться вилкой или ножом.
Как мандарины сварятся, выложить их на тарелку, дать им остыть.
Порезать на две части и вынуть косточки.
Положить свареные мандарины в комбайнер, и довести до состояния пюре.
Добавть все остальные ингредиенты и еще раз все хорошо перемешать.
Смазать сливочным маслом форму для выпечки.
Выложить в форму тесто.
Выпекать в разогретой духовке при 180 градусах в течении 45 минут.
Пирог должен подрумяниться сверху.
Проткните его ножком:если нож сухой, то пирог испекся, если нет, то пропеките его до готовности в течении дополнительных 5-10 минут.
Как пирог пропекся, вынуть его из духовки и дать ему остыть.
Только после того, как пирог охладился, вынуть его из формы и выложить на красивую тарелку.

Совет: Этот пирог может быть приготовлен из свареных апельсин или лимон. Так советует Найджила, автор этого рецепта.

mercredi 24 mars 2010

Purée de céleri / Celery Root Puree / Пюре из сельдерея


French Version

Purée de céleri

Aujourd’hui on va cuisiner le céleri-rave qui est riche en fibres, minéraux, vitamines B6, C, oligo-éléments rares et en plus il est très pauvre en calories. J’ai vu cette recette dans une émission culinaire russe « SMAK » diffusée sur une chaine russe. La recette a été présentée par une chanteuse folklorique russe Nadezhda Babkina. Il parait qu’elle a perdu beaucoup de poids en suivant le régime minceur à base de céleri. Maintenant elle a l’air d’être en bonne forme physique dans ses 55 ans. Optons-nous pour la purée de céleri pour rester en pleine forme !

Pour 4-6 personnes :
1 céleri rave
130 ml de lait de soja ou de crème fraiche liquide
2 c à soupe de beurre
2 oignions
Sel, poivre
1 c à café de noix de muscade
Persil frais ou sec

Préparation :
Eplucher le céleri rave. Le couper en petits dés. Mettre dans une casserole et couvrir d'eau.
Laisser cuire pendant 15-20 minutes.
Pendant ce temps, éplucher les oignions, couper les en petits cubes et faire les dorer avec un peu de beurre.
Lorsque les morceaux sont tendres, passer les au mixer avec le sel, le poivre, la noix de muscade et le persil.
Ajouter le lait ou la crème fraiche tiède, le beurre, les oignions dorées à la purée. Mélanger bien.

Conseil : Vous pouvez ajouter 2 pommes de terre cuites à la purée de céleri.

English Version

Celery Root Puree

Today I am proposing you celery root puree which will bring you a taste of something new. It is very poor in calories and rich in vitamin C, B6, iron, calcium, magnesium and potassium. This puree is lighter than the usual mashed potatoes. In this recipe I used soy milk or soybean milk which is full of of protein as cow's milk and has little saturated fat and no cholesterol. I saw this recipe in a Russian culinary show "Smak" (Russian: "Смак") broadcasted on the Russian channel. The recipe was proposed by one famous Russian pop-folk singer Nadezhda Babkina. She lost lots of kilos on the celery diet and now she seems to be in a perfect shape in her 55 years. So, if you want to adopt a healthy lifestyle, opt for this spring vegetable recipe !

Serves 4-6:
1 celery root of medium size
130 ml of soy milk or whipping cream
2 tablespoons of butter
2 onions
Salt, pepper to your taste
1 teaspoon of nutmeg
Some parsley

How to make it:

Cut off the roots of the celery root, then peel and wash it. Cut it into small sized chunks.
Place the cut celery in a big pot and cover with cold water. Add a 1/2 teaspoon of salt to the cooking water.
Bring it to a boil and cook over a medium heat until tender – about 15-20 minutes.
In the meantime, peel onions, cut them into small chunks and brown them with some butter.
Drain the vegetables and puree them using your favorite method (potato masher, food mill, or food processor).
Warm the milk or cream in a small pan.
Add warm milk, butter, nutmeg, salt , parsley and browned onions. Mix it into the puree and serve hot.

Advice: you can add 2 big boiled potatoes to celery puree.

Russian Version

Пюре из сельдерея по рецепту Надежды Бабкиной из передачи Смак

Сегодня мы будем готовить корень сельдерея, и сделаем из него ароматное и полезное пюре. В сельдерее полезно все: корни, стебли и листья. Сельдерей низкокаллориен (всего 18 ккал) и в тоже время богат полезными веществами, в нем содержатся: цинк, калий, кальций, фосфор, железо, магний, витамин С, витамины группы В, РР, Е и провитамин А. Сильный аромат и специфический вкус ему придают эфирные масла. Рецепт, который я вам предлагаю, был приготовлен Надеждой Бабкиной в передаче «СМАК». Что мне понравилось в этом рецепте, так это то, что вместо того, чтобы добавить в него сметану для придания вкуса, Надежда Бабкина использовала легко усвояемое соевое молоко, в котором содержатся все восемь незаменимых аминокислот и микроэлементов. Но если вы не сторонник соевого молока, замените его на жидкую низкокаллорийную сметану или сливки. Я думаю, что стоит ввести в рацион сельдерей, который, как пишут специалисты, придает бодрость и силы и является источником молодости !

На 4-6 порции:

сельдерей (корень) - 300-500 гр
молоко соевое - 130 мл
сливочное масло - 2 ст.л.
соль, перец – по вкусу
мускатный орех – 1 ч ложка
2 луковицы
зелень по вкусу

Как приготовить:

Ножом очистить сельдерей от кожицы. Нарезать мелкими кубиками.
Отварить в подсоленой воде до готовности (приблизительно 15-20 минут)
В это время почистить лук, порезать его на кубики и обжарить на сливочном масле.
Сделать из отваренного сельдерея пюре.
Разогреть соевое молоко на медленном огне. Добавить в пюре.
Добавить обжаренный лук в пюре.
Добавить сливочное масло.
Посолить, поперчить по вкусу.
Добавить зелень, например, петрушку.

Совет: В пюре можно добавить 2 отваренных картошки.

jeudi 18 mars 2010

Saucisses de Montbéliard aux lentilles et aux carottes / Montbeliard sausages with lentils and carrots /Свиные сардельки с чечевицей и морковкой


French Version

Saucisses de Montbéliard aux lentilles et aux carottes

Enfin le printemps est arrivé ! Ca fait plaisir ! Nous profitons pleinement des journées plus chaudes et ensoleillées. Il est vrai qu’en ce moment nous avons plutôt envie de manger des plats légers aux légumes printaniers. Le plat que je vous propose est un bon plat d’hiver, copieux et savoureux. Mais son grand avantage est sa simplicité. On le prépare en un clin d'œil. S’il vous arrive de manquer de temps pour cuisiner ou tout simplement vous n’avez pas envie de passer des heures aux fourneaux, cette recette facile et très bonne est pour vous !

Pour 4 personnes, il vous faut :

2 oignons
2 carottes
500 gr de lentilles vertes
4 saucisses de Montbéliard
½ cube de bouillon de volaille
1 l d’eau
2 c à café d’herbes de Provence
1 c à soupe de persil
Sel, poivre

Eplucher et émincer les oignions.
Peler les carottes et couper les en petits cubes.
Mettre le beurre et l’huile d’olive dans une casserole.
Faire y dorer les oignions émincés et les carottes coupées.
Quand les oignions et les carottes sont dorées, mouiller les avec 1 l d’eau froide, verser y les lentilles.
Ajouter y le bouillon.
Saler, poivrer.
Ajouter les herbes et le persil.
Porter à l’ébullition et laisser cuire pendant 20-25 minutes
Dans une autre casserole faire cuire les saucisses pendant 20 minutes
Retirer du feu, couper les en rondelles.
Ajouter les saucisses aux lentilles.
Mélanger le tout et laisser cuire 5-7 minutes à feux doux.

English Version

Montbeliard sausages with lentils and carrots

You can ask me : Why do we have to eat sausages and lentils when the spring is coming with its first fresh vegetables ? You’re absolutely right. The dish I am proposing you today is more a winter one. But the reason why I am proposing it to you lies in the simplicity of this recipe. No efforts are needed to make this recipe. All you need is some sausages, lentils, carrots and onions. I guess all these ingredients can be easily found in a fridge, perhaps except for sausages. The sausages I use in this recipes are called Montbeliard, specialty of France-Compte. These are sausages made with high quality pork, spiced with cumin, nutmeg and white wine. But if you cannot find them at your local supermarket, replace them for any other sausages of your choice. If you are busy at work and you don’t feel like slaving over a hot stove in the evening , follow my instructions to make this quick, simple and delicious recipe.

2 onions
2 carrots
500 gr of lentils
4 sausages
½ cube of chicken stock
1 liter of water
2 teaspoons of Provence herbs ( a mixture of dried herbs: marjoram, thyme, savor, basil, rosemary, sage, fennel seeds)
1 tablespoon of dried of fresh parsley
Salt, pepper

Peel and slice onions.
Peel carrots and cut them into small cubes.
Place butter and olive oil into a saucepan.
Brown the onions and carrots.
When they are well browned, add 1 liter of water and incorporate lentils.
Pour in chicken stock.
Add salt, pepper and herbs.
Bring to a boil and cook for 20 minutes until lentils are tender.
In another saucepan cook sausages as indicated on the package. (I cooked Montbeliard sausages for 20 minutes.)
When the sausages are cooked, take them from the heat. Let them cool and cut into slices.
Add sliced sausages into lentils. Combine everything and continue cooking for 5-7 minutes over a low heat.

Russian Version

Свиные сардельки с чечевицей и морковкой

Вы, наверное, спросите меня: почему я предлагаю этот рецепт, когда на улице весна и солнце ? Да, вы правы, когда к нам приходит весна, то нам хочется приготовить что-нибудь легкое из свежих весенних овощей. Блюдо, которое я вам предлагаю, отлично подходит для зимней погоды, но прелесть этого рецепта заключается в том, что он очень прост и быстр в приготовлении. Вам не понадобятся какие либо усилия или замысловатые продукты, чтобы его приговить. Я думаю, что у каждой хозяйки найдется морковь, лук и чечевица. Пожалуй, придется сходить в магазин только за сардельками. В этом рецепте я использую французские сардельки под названием «Монтбелиар». Это свиные полу-копченые сардельки со добавлением специй (тмин, маскатный орех). Для этого рецепта подойдут любые сардельки на ваш вкус. Итак,если вы заняты на работе и вам некогда стоять у плиты по вечерам, то приготовьте этот быстрый и вкусный рецепт всего за пол часа.

На 4 порции вам понадобится:

2 луковицы
2 моркови
500 гр чечевицы
4 сардельки
½ кубика куриного бульона
1 литр воды
1 ч ложки специй и сушеных трав, в состав которых входит майоран садовый, тмин, базилик, розмарин, шалфей, фенхель.
1 ст ложка сушеной или свежей петрушки
Соль, перец по вкусу


Как приготвоить:
Почистить лук. Тонко его нашинковать или нарезать тонкими полукольцами.
Почистить морковь. Порезать на кубики.
Обжарить морковь и лук на сливочном масле с оливковым маслом в кастрюле.
Как лук и морковь обжарятся до золотистого цвета, влить 1 литр воды, затем добавить чечевицу.
Положить ½ кубика бульона в чечевицу для придания вкуса. Посолить, поперчить по вкусу и добавить специи и травы.
Довести до кипения. Закрыть крышкой и варить чечевицу до готовности.
В это время сварить сардельки ( по времени смотрите на упаковку).
Как сардельки сварятся, вынуть их из кастрлюли. Дать остыть и порезать на одинаковые части.
Как сварится чечевица, добавить в нее порезанные сардельки. Все перемешать.
Накрыть крышкой и дать провариться на медленном огне в течении 5-7 минут.

Purée de potimarron au roquefort et au mascarpone /Pumpkin puree with blue cheese and mascarpone / Пюре из тыквы с маскарпоне и с рокфором


French Version

Purée de potimarron au roquefort et au mascarpone

Je vous propose une recette d’une bonne purée maison au potimarron, bien crémeuse et savoureuse ! Vous pouvez la servir comme l’entrée ou en garniture pour accompagner la viande ou le poisson.

Pour 4-6 personnes, il vous faut :

1 potimarron moyen
125 gr de mascarpone
125 gr de roquefort ou bleu ou fourme d’Ambert
Sel, poivre

Préparation :
Faire cuire le potimarron entier pendant 25-30 minutes.
Sortir. Couper en deux. Vider les graines centrales.
Réduire la chaire en purée
Y ajouter le mascarpone et le fromage.
Saler, Poivrer à votre gout.

Conseil : Vous pouvez ajouter 1 cuillère à soupe de noix de muscade

English Version

Pumpkin puree with blue cheese and mascarpone

Today we are going to make homemade creamy and tasty pumpkin puree with mascarpone and blue cheese flavors. You can serve it as an appetizer in individual mini bowls or as a side dish to accompany your meat or fish.

Serves 4-6:
1 medium pumpkin or squash
125 gr of mascarpone cheese
125 gr of Roquefort or fourme d’Ambert or any other blue cheese
Salt, pepper

How to make it :
Cook pumpkin in a large saucepan in a large quantity of water for 25-30 minutes until cooked.
Take it off. Split the pumpkin in half and seed it.
Scoop the flesh out of each pumpkin half.
Puree in a food processor.
Add mascarpone and blue cheese. Mix again.
Salt, pepper to your taste.

Advice : you can add 1 teaspoon of nutmeg.

Russian Version

Пюре из тыквы с маскарпоне и с рокфором

Сегодня я вам предлагаю рецепт тыквенного пюре со вкусом итальянского сыра маскарпоне и французского сыра с плесенью рокфор. Пюре получается нежным и ароматным. Вы можете подать его отдельно, как самостоятельное блюдо, либо подать его с рыбой или мясом. Если у вас не оказалось сыра маскарпоне, то замените его на густую сметану. Вы можете также использовать любой тип сыра с плесенью: рокфор, горгонзола, фурм д’Амбер...

На 4-6 порции вам понадобится:
1 тыква, среднего размера
125 гр сыра маскарпоне
125 гр рокфора либо любого другого сыра с плесенью
Соль, перец

Отварите тыкву в кастрюле с большим количеством воды в течении 25-30 минут. Чтобы проверить, сварилась ли тыква, проткните ее вилкой. Если кожица протыкается легко, то значит тыква хорошо проварилась изнутри.
Выньте ее из воды.
Разрежьте на 2 части.
Выньте семечки.
Выньте ложкой мякоть.
Мякоть положите в комбайнер и измельчите до состояния пюре.
Добавьте маскарпоне и рокфор. Еще раз все хорошо перемешайте.
Посолите, поперчите на ваш вкус.

Совет: Вы можете приправить ваше пюре 1 ч ложкой мускатного ореха.

mardi 16 mars 2010

Gâteau de Pâques russe - le « Koulitch » / Russian Easter cake « Kulich » / Пасхальный Кулич


French Version

Koulitch aux raisins parfumés au rhum et aux noix

Cette année le jour de Pâques Orthodoxe tombe sur dimanche le 04 avril. Pour cette occasion comme chaque année je vais préparer un gâteau traditionnel de la Pâque russe appelé le « Koulitch ». On le prépare plusieurs jours à l’avance. Ce gâteau ressemble beaucoup aux brioches aux raisins. C’est un gâteau riche en farine et en beurre. La pâte est préparée avec la levure de boulanger qui la fait gonfler. J’aime particulièrement ce gâteau car il me rappelle mon enfance quand ma grand-mère paternelle l’a préparé pour toute la famille. Malheureusement je n’ai pas pu récupérer sa recette. Par contre, ma grand-mère maternelle a été ravie de partager sa recette à elle avec moi. Depuis je suis sa recette à la lettre et mes « koulitch » sont bien réussis : ils sont aérés, moelleux et bien parfumés. J’adore la bonne odeur de koulitch qui cuit dans le four. Si la recette de ce merveilleux gâteau russe vous tente, voici les ingrédients nécessaires et les étapes pour réussir ce gâteau !

Temps de préparation : 20 minutes
Levée de la pâte : 2h
Temps de cuisine : 45 minutes
Vous obtiendrez 2 gâteaux.
Chaque gâteau est pour 6-8 personnes.

Il vous faut :

4 verres de farine
0.5 verre de sucre
4 œufs
200 gr de beurre ramolli
1 sachet de sucre vanillé
Un peu de sel
25 gr de levure de boulangerie fraîche (vraie levure vivante qui fait monter la pâte) - Grandes surfaces, rayon pain.
0.5 litre de lait tiède+ 2 cuillères à soupe de lait (pour y dessoudure la levure)
1 bonne cuillérée à soupe de l'huile d'olive extra vierge (préférez l'huile de bonne qualité)
1 poignée de raisins secs (200 -250 gr) et de noix (50-100 gr) : cela dépend de vos envies et préférences
3-4 cuillères à soupe de rhum blanc ou brun (pour y faire tremper les raisins)

Préparation de pâte :

Mélanger les ingrédients dans un très grand bol/saladier dans l'ordre suivant :
1. Les œufs avec le sucre, le sel + le sucre vanillé

2. Le lait (faire le chauffer au micro-ondes pour qu'il soit tiède)

3. La farine

4. Mélanger bien la levure dans 2 cuillères à soupe de lait afin d’éviter les grumeaux

5. L’huile d'olive

Une fois la pâte faite, mettre la préparation dans un endroit protégé, fermer avec un torchon et laisser la reposer pendant 1 h. Laisser lever au double de son volume.
1h plus tard, pétrir la pâte et laisser reposer encore 1 ou 2h.

Faire tremper les raisins dans le rhum pendant que la pâte lève. Ensuite égoutter les.

Ajouter les raisins et les noix dans la pâte. Mélanger.

Préchauffer votre four à 180C .

Beurrer le moule à brioche : y disposer la pâte et enfourner pendant 45 minutes.

Vous devez obtenir 2 bons kouliches avec cette quantité de pâte.

Koulich se mange également avec la confiture ou nature. Je préfère le manger avec de la confiture au lait : c’est un vrai régale.

Si vous n'avez pas un moule à koulich, vous pouvez utiliser un moule à brioche ou un moule assez haut car la pâte gonflera au-dessus du moule pendant la cuisson.

Bon appétit et Joyeuses Pâques !


English Version

Kulich with rum flavored raisins and walnuts

Orthodox Easter is coming soon. This year it will be celebrated on April, the 4th. As each year I am going to bake traditional Russian Easter cake called “Kulich”. Traditionally the cake is prepared 1 or 2 days ahead as well as eggs painting. It is the most awaited Easter dish. When I was a little girl I could hardly wait for Easter morning when you are allowed to eat “Kulich” and crash Easter eggs. Kulich is a rich, sweet bread which is baked in a tall mold and decorated with white sugar icing and candy sprinkles. I particularly love this cake. I love making it and I love eating it. Its taste and smell take me back to my childhood when my grandma Klavdiya (my dad’s mom) made it for the whole family. Unfortunately when my grandma Klavdiya was alive, I didn’t ask her for the recipe. But my grandmom Galina (my mom’s mom) was happy to share with me her recipe of kulich. Since that time I closely follow her recipe and my kulich turned to be fluffy, moist and flavored. What I love about it ? While the cake is baking, it fills the house with a dreamy heavenly cake smell. If you want to give a try to this wonderful Easter cake, follow my instructions!

Preparation time: 20 minutes
Dough preparation: 2 hours
Cooking time: 45 minutes
You’ll get 2 cakes: each cake serves 6-8.

You’ll need :
4 cups of all-purpose flour (1 cup=250 ml)
½ cup of sugar
4 eggs
200 gr of unsalted butter, softened
2 tablespoons of vanilla sugar
A pinch of salt
25 gr of fast rising fresh yeast
½ cup of lukewarm milk + 2 tablespoons of milk for dissolving fresh yeast in it
1 tablespoon of good olive oil
200-250 gr of raisins
50-100 gr of walnuts
4 tablespoons of rum of your choice

Combine the ingredients in the following order to make dough.
1. Eggs with sugar, vanilla sugar and salt
2. Add milk
3. Incorporate flour
4. Dissolve yeast in 2 tablespoons of warm milk
5. Add olive oil

When all ingredients are combined, knead dough until soft and slightly sticky.

Form a ball and put it into a large bowl. Cover with wet towel.

Let it rest for 1 hour in a warm place. It will rise and double its volume.

Knead the dough again for about 10-15 minutes, pounding it against the table occasionally. The more you knead, the more airy the dough.

Let it rest for another 1 hour.

In the meantime, place rum and raisins in a small bowl and allow to stand for 1 hour. Then take off the liquid.

When the dough is ready, incorporate raisins and walnuts. Mix all together.

Then divide the dough in half and put it in greased kulich moulds.

Bake kulich at pre-heated oven at 180 C for 45 minutes.

Enjoy your meal and Happy Easter !


Russian Version

Пасхальный кулич по рецепту бабушки

Каждый год я пеку свои куличи на Пасху, и этот год - не без исключения. Рецепт, который я вам предлагаю, был мне дан моей бабушкой Галиной (маминой мамой). С тех пор, как она мне его дала, я готовлю куличи только по ее рецепты. Куличи получаются ароматными, мягкими и воздушными. Если вы тоже собираетесь печь куличи на Пасху, то попробуйте их испечь по моему рецепту и вы не разочаруетесь !

Время приготовления теста:15-20 минут
Время на поднятие теста: 2 часа
Время выпечки: 45 минут
Рецепт рассчитан на 2 кулича, каждый кулич на 6-8 порций

Список продуктов:

4 стакана муки
½ стакана сахара
4 яйца
200 гр мягкого сливочного масла
1 пакетик ванильного сахара
Щепотка соли
25 гр свежих дрожжей
½ стакана теплого молока
2 чайные ложки теплого молока, в котором вы расстворите дрожжи
1 чайная ложка оливкового масла
200-250 гр изюма
50-100 гр грецких орехов
4 столовых ложки рома, в котором вы замочите изюм (я использовала ванильный ром, купленый на острове Маврикий, но подойдет и простой обычный ром )

Перемешайте ингридиенты в следующем порядке:
1. Яйца с сахаром, ванильным сахаром и солью
2. Добавьте молоко
3. Всыпьте муку
4. Растворите дрожжи с 2мя ложками молока
5. Добавьте оливковое масло

Как только вы перемешаете все ингредиенты вместе, вымесете тесто, накройте и поставьте в теплое место для подъема на 1 час.

Как пройдет 1 час, вымесите тесто еще раз, накройте и дайте поднться еще в течении 1 часа.

Приготовьте изюм: положите его в миску с ромом. Дайте настояться в течении 1 часа.

Или можно накрыть его и поставить разогреться в микроволновку на 1 минуту.

После откинуть жидкость и оставить пропитавшийся ромом изюм.

Добавьте изюм и орехи в тесто. Перемешайте.

Смажьте формочки для куличей сливочным маслом.

Выложите в них тесто и выпекайте в разогретой духовке при 180 градусах в течении 45 минут.

Приятного аппетита и с наступающими пасхальными праздниками !